Author: Thomas Young

  • Back to school…

    Ono Sensei

    In April 2022 I finally took the leap and decided not to renew my teaching contract. Instead, I chose to apply for a place on a one year course to study Japanese carpentry and house building.

    The course was a one year residential architecture course (住宅建築 -‘jutaku kenchiku’), based at Takumi International Academy in Minokamo City, Gifu Prefecture.

    https://www.takumi.ac.jp/index.html

    Essentially the course is designed for high school graduates (18 years old), who are looking for practical training and career guidance to help them find work as quickly as possible. There is no age limit for applicants, which came as a relief to me!

    The application process involved writing a statement as to why you wished to study there. There was also an aptitude test and an interview.

    The aptitude test was similar to the 11+ (if you’re from the UK you might know what I am talking about). It was a booklet with pattern recognition tasks, number sequences and other logic / motor skills tasks to be completed within a set time limit. (If you search IQ / aptitude tests online you will see some examples of the kind of tasks).

    I managed to pass the entrance requirements and was offered a place. I was also offered a room in the dormitory from Monday to Friday. (You had to vacate the room and return home on weekends).

    The training ground – where theory is put into practice.

    Course Structure

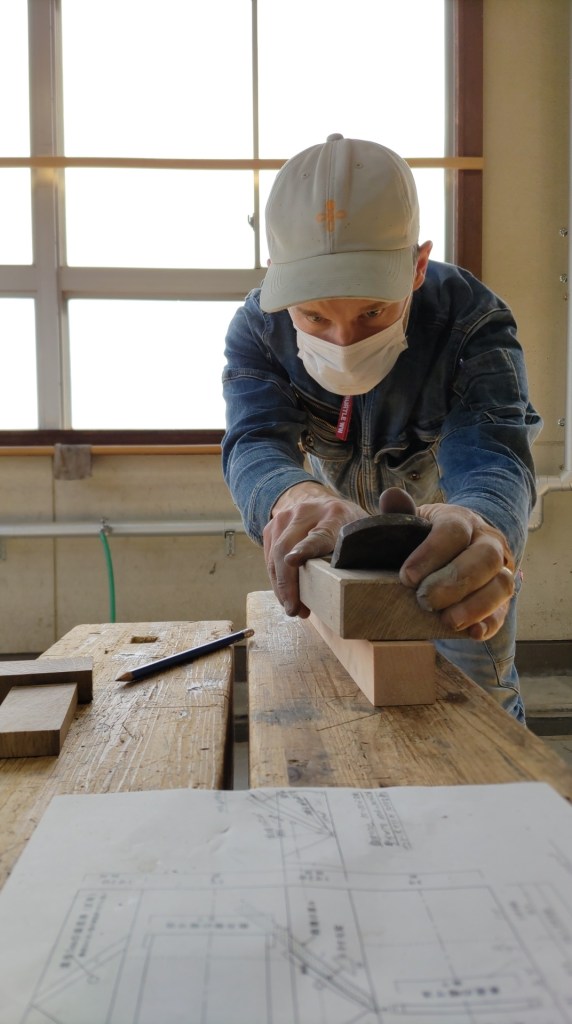
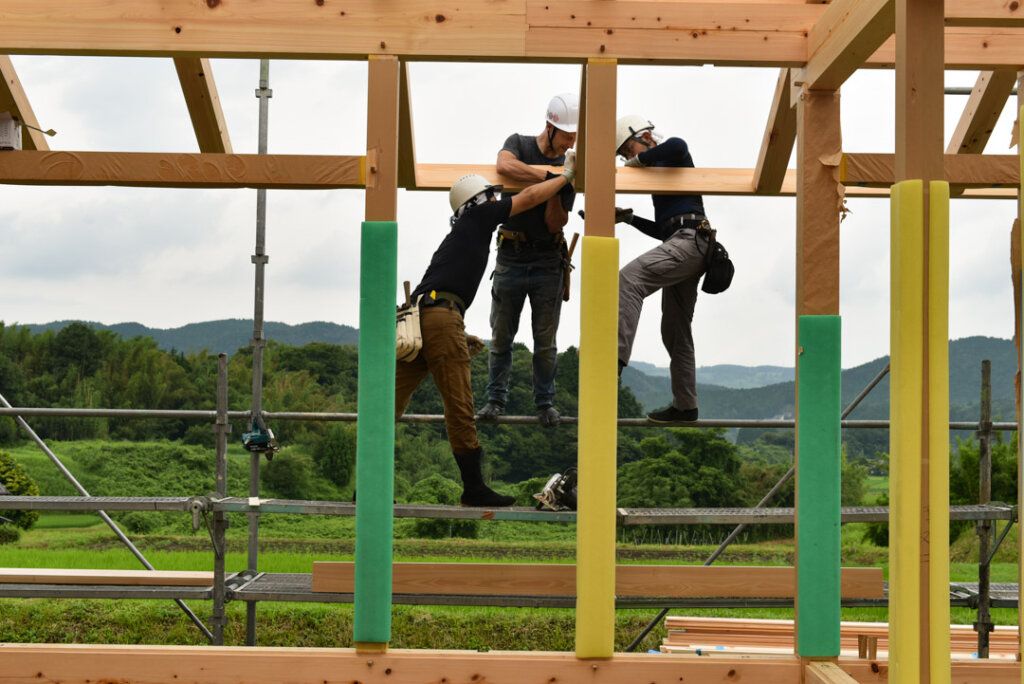
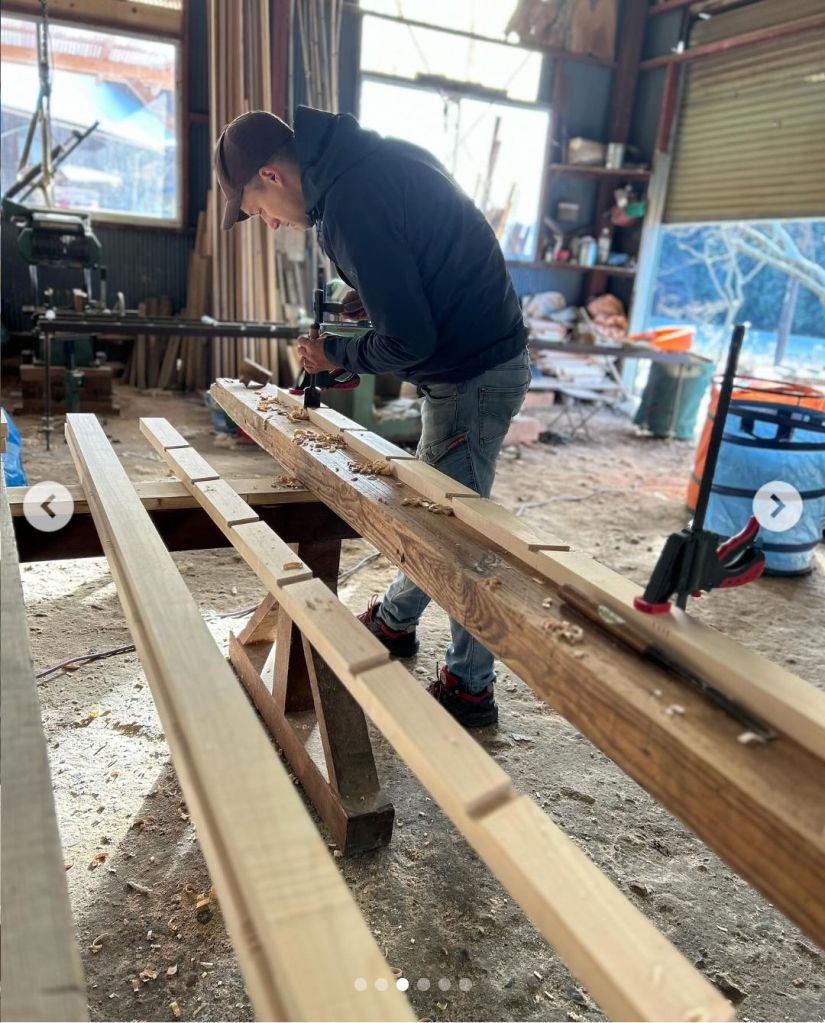
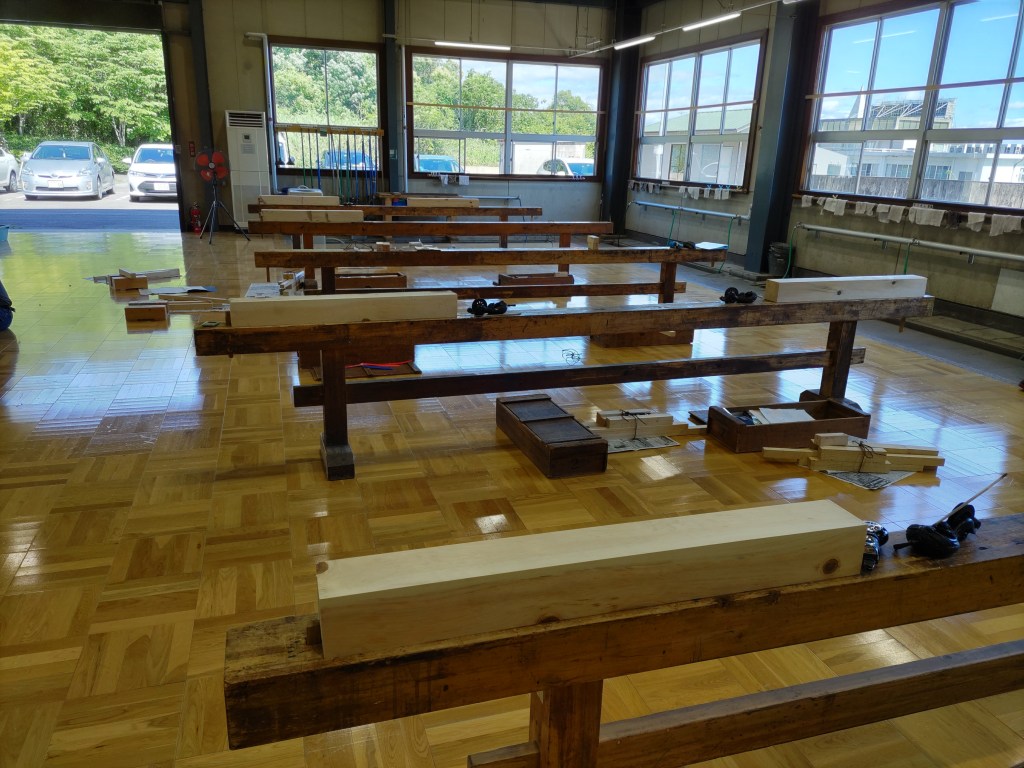
    The course was split roughly 50/50 into theory sessions in the classroom and practical training sessions in the training ground (自主場 – “jisshyu ba”).

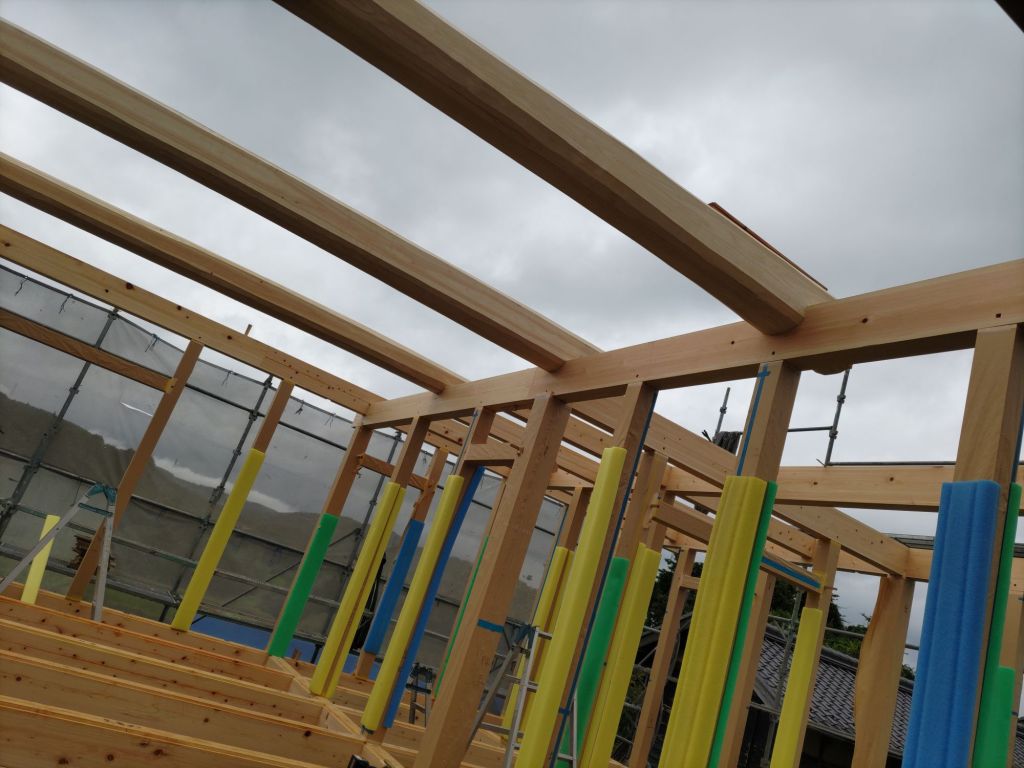
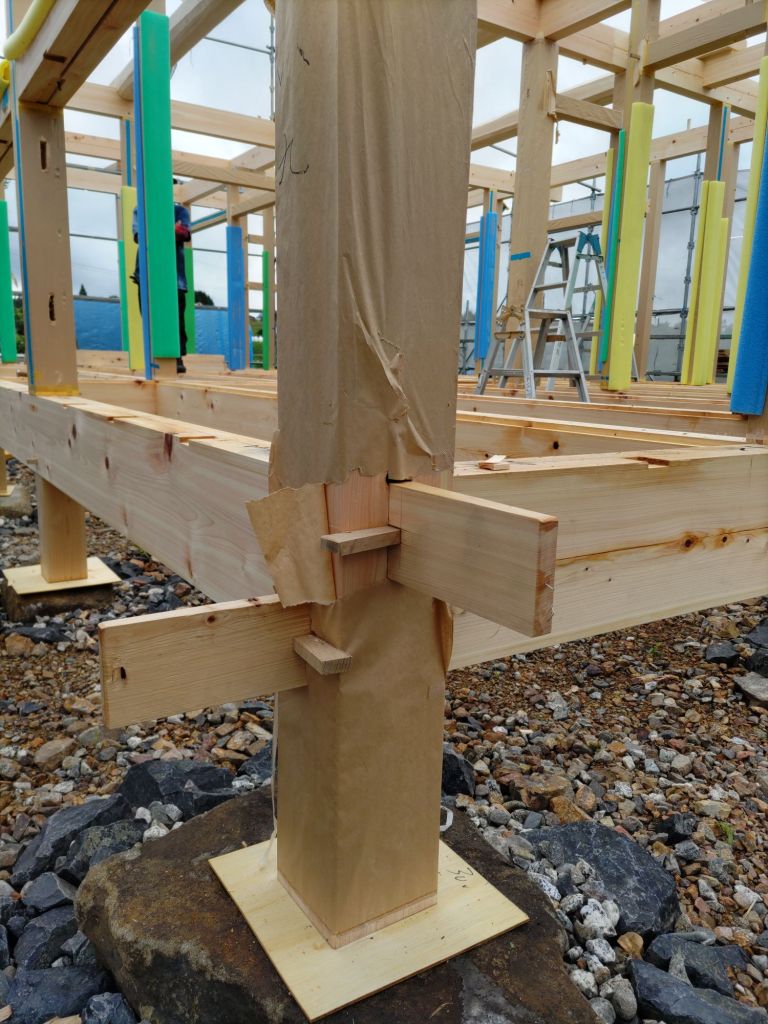
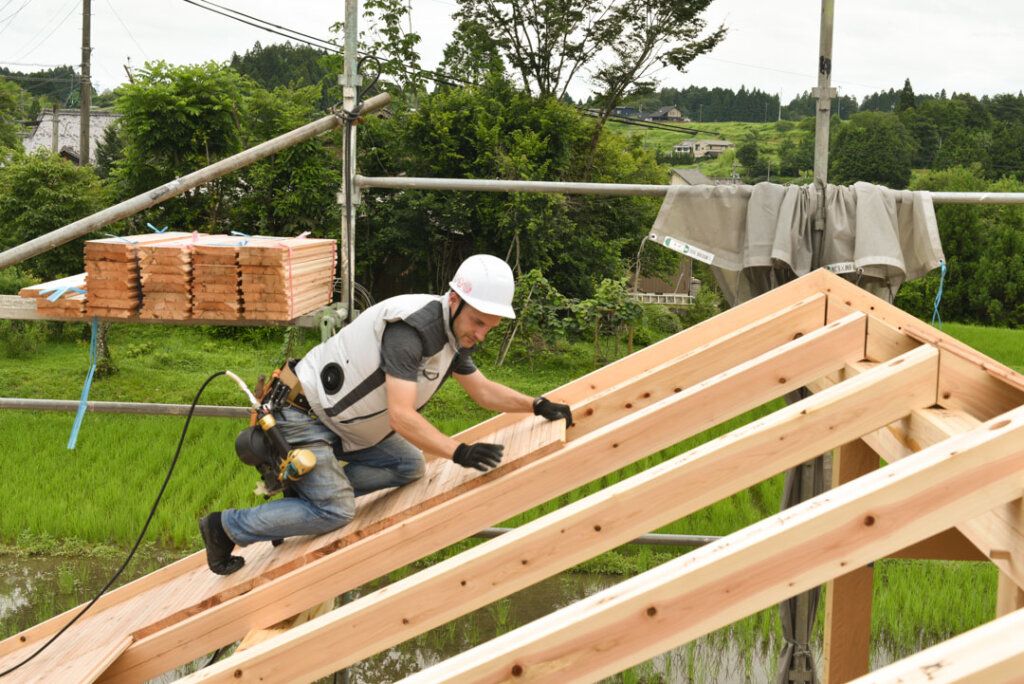
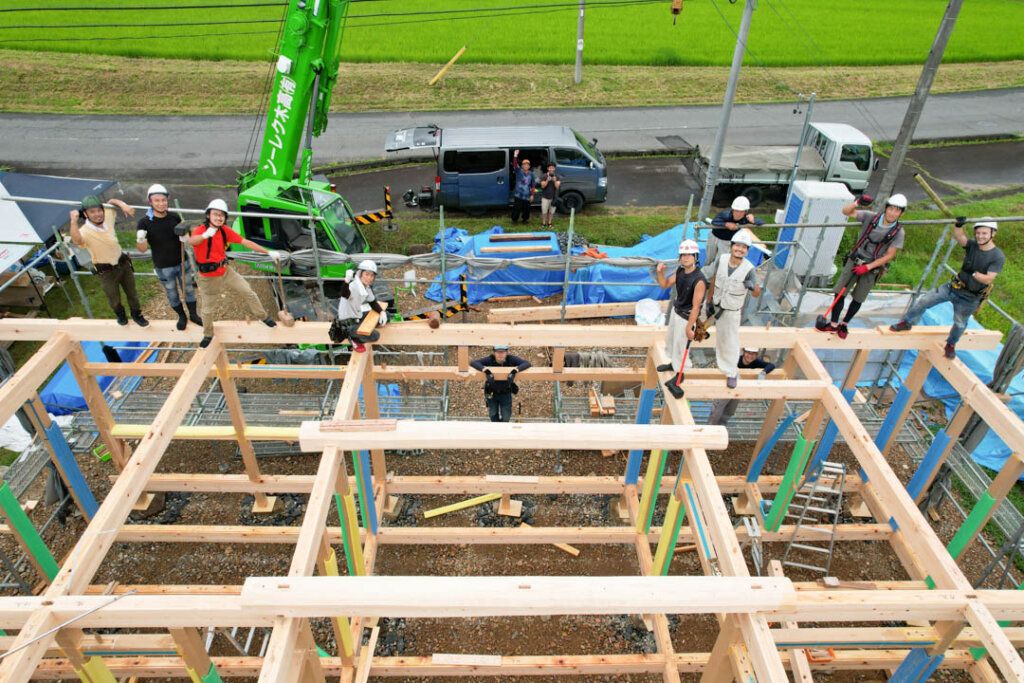
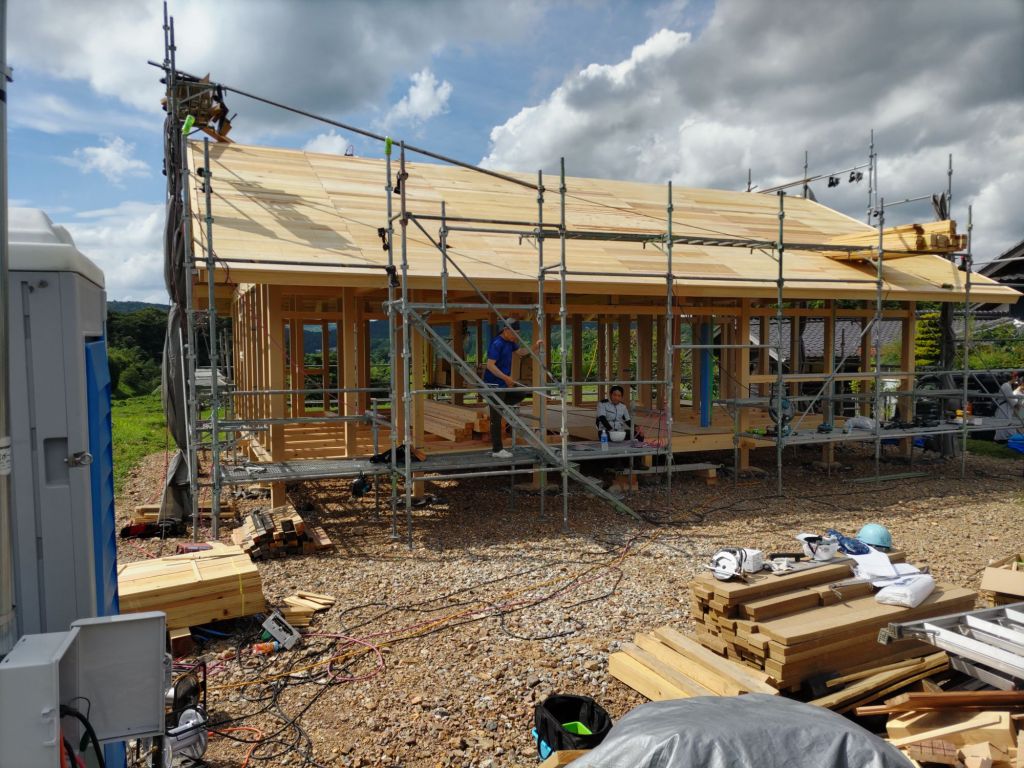
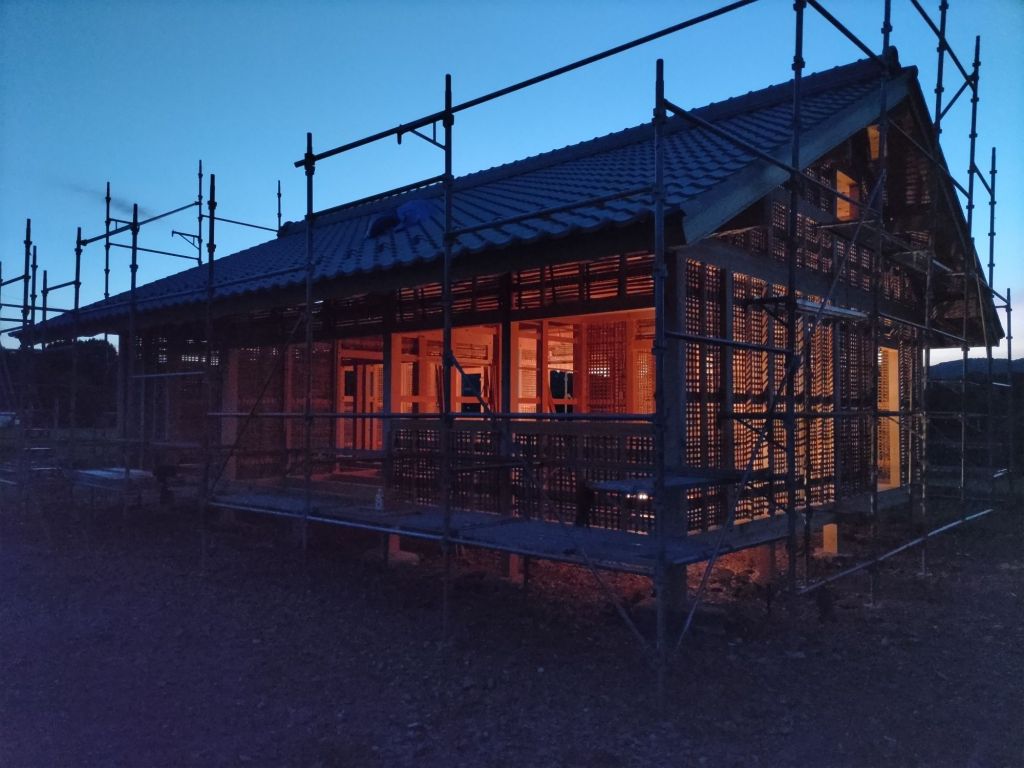
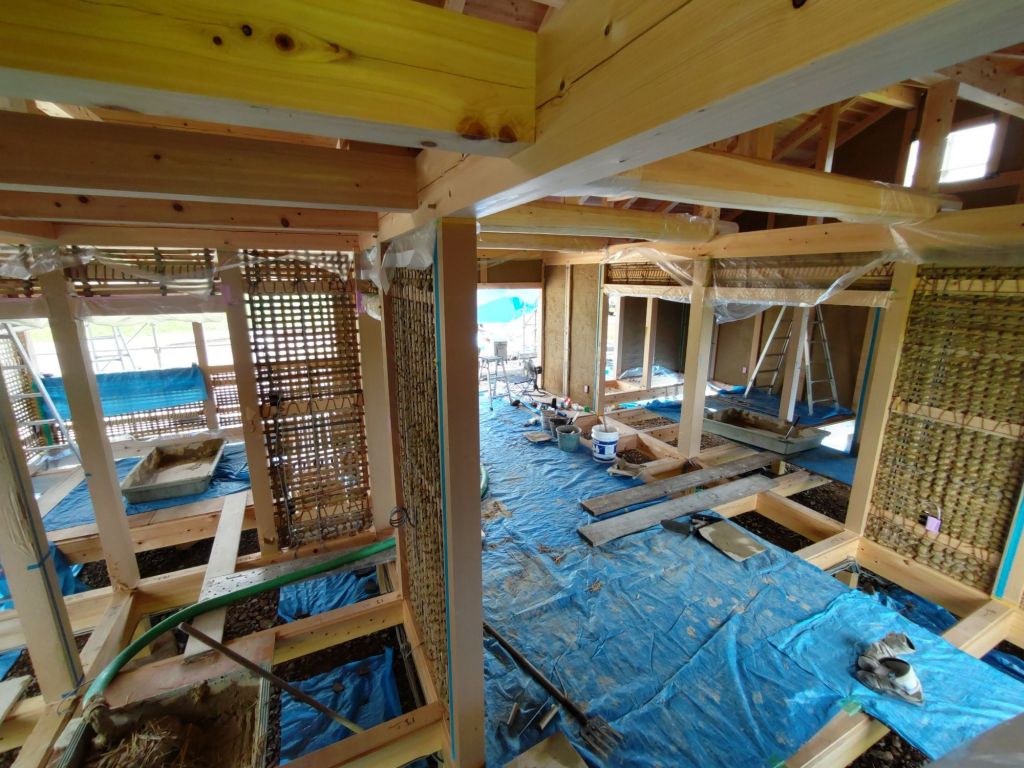
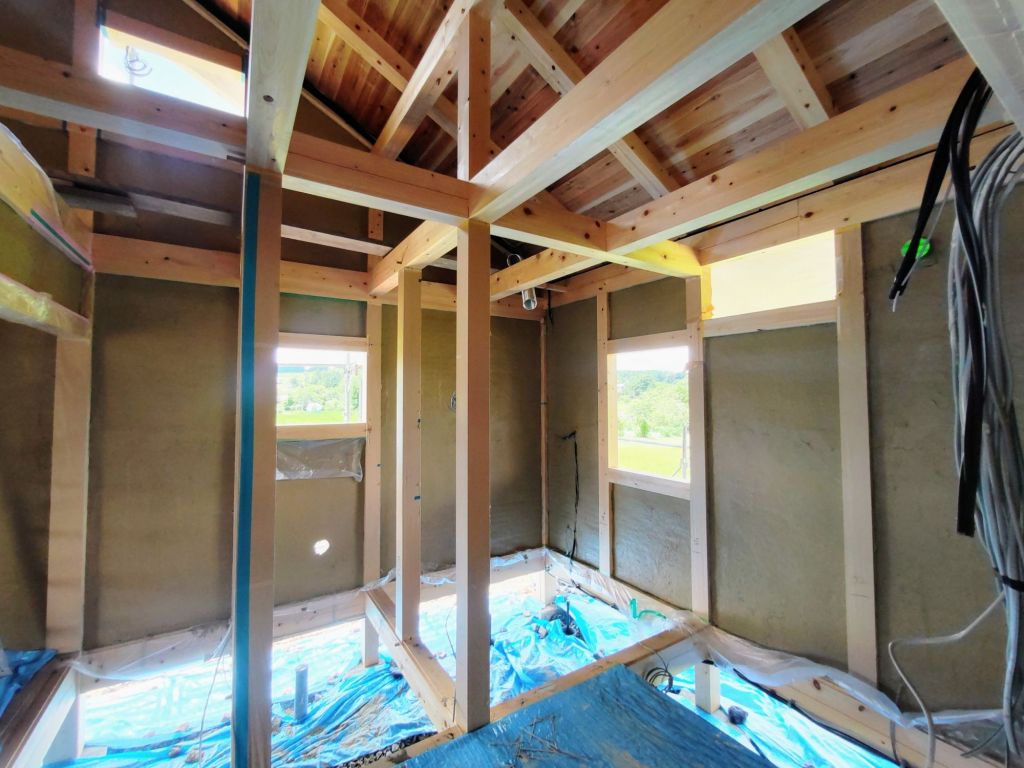
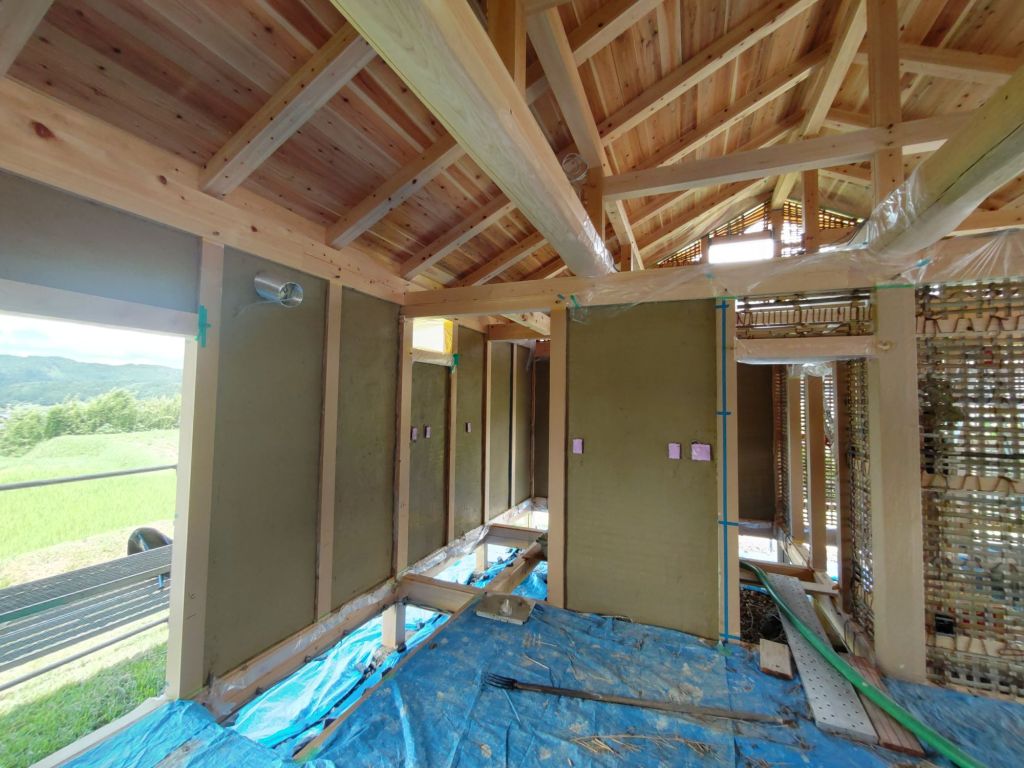
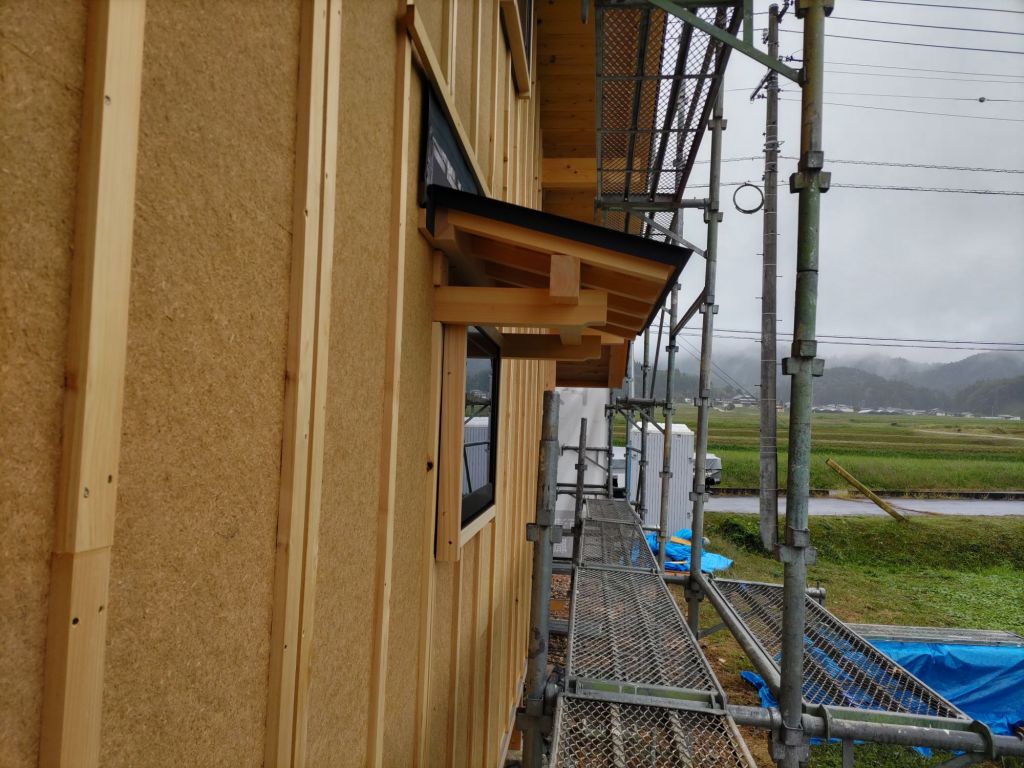
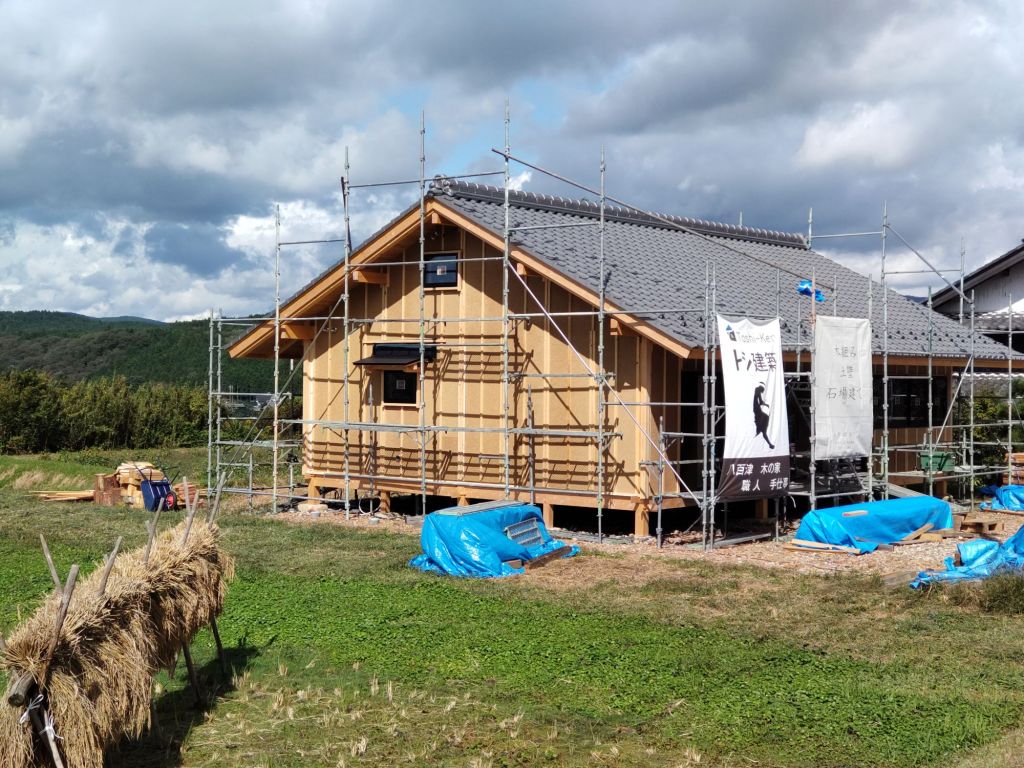
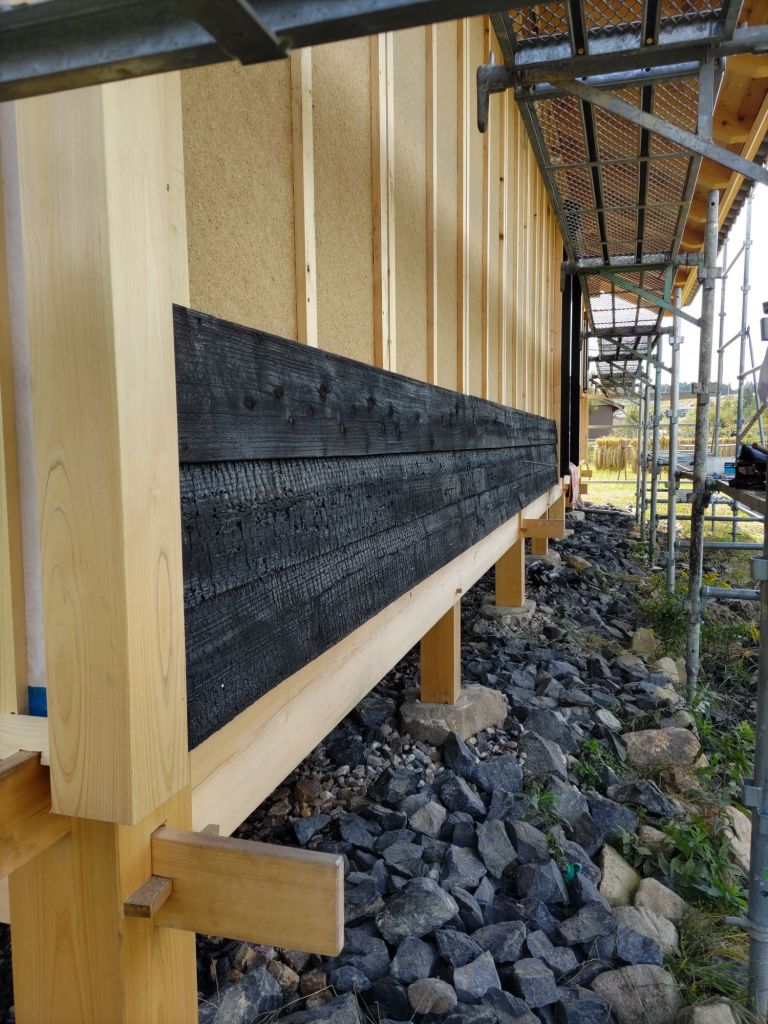
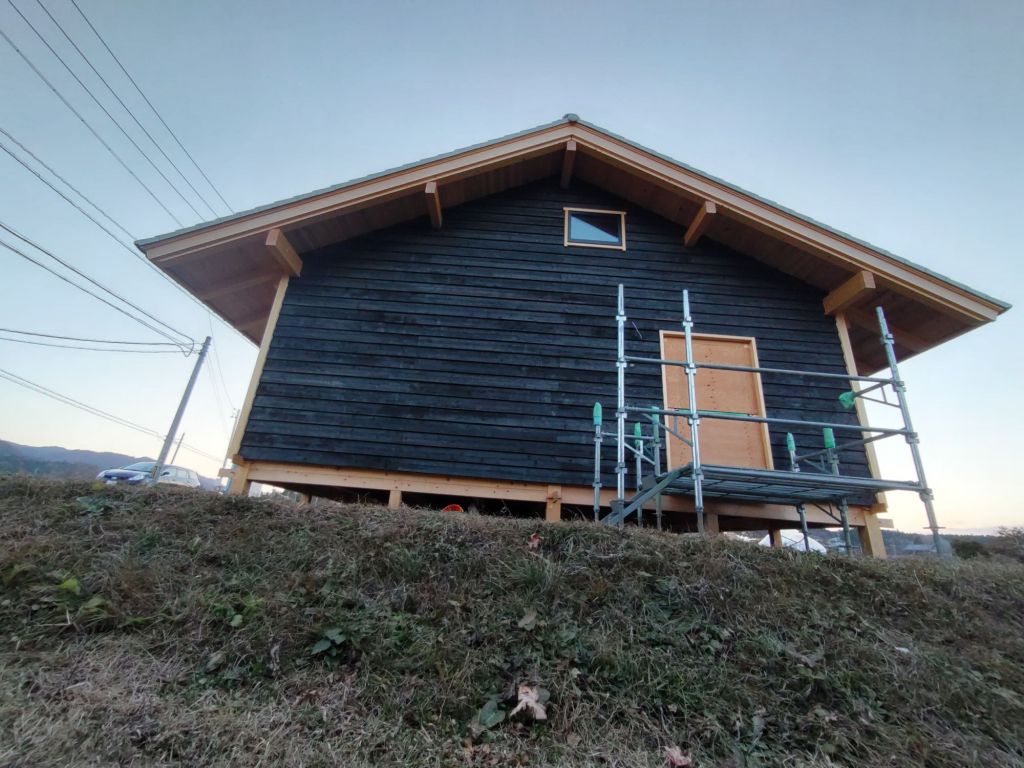
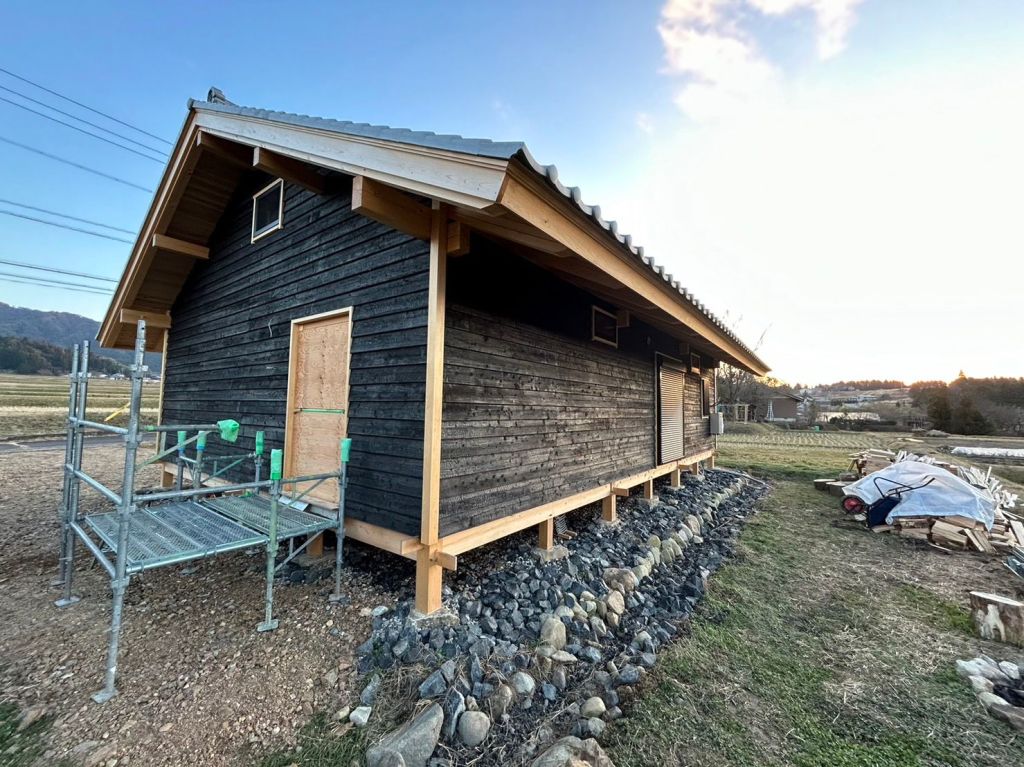
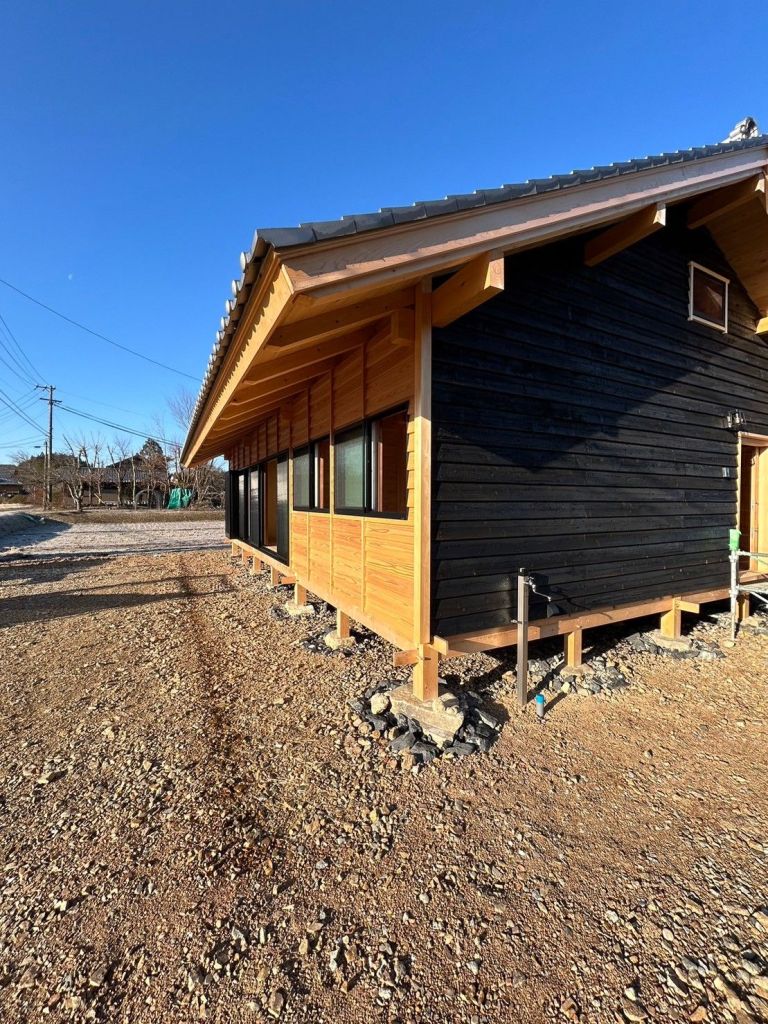
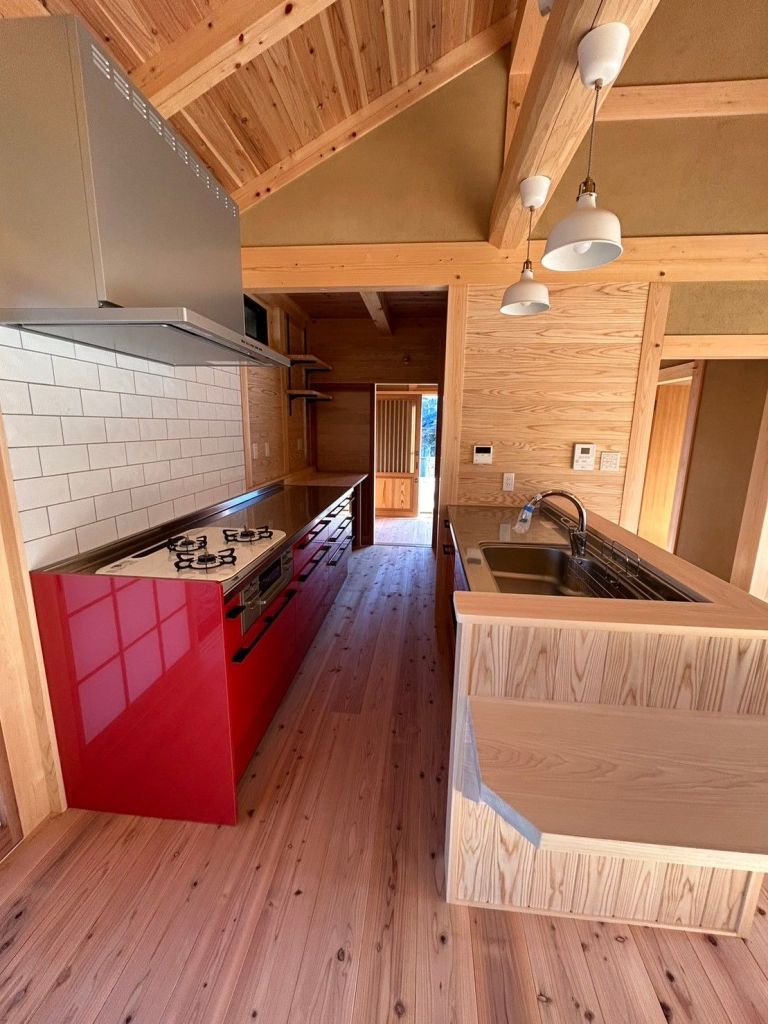
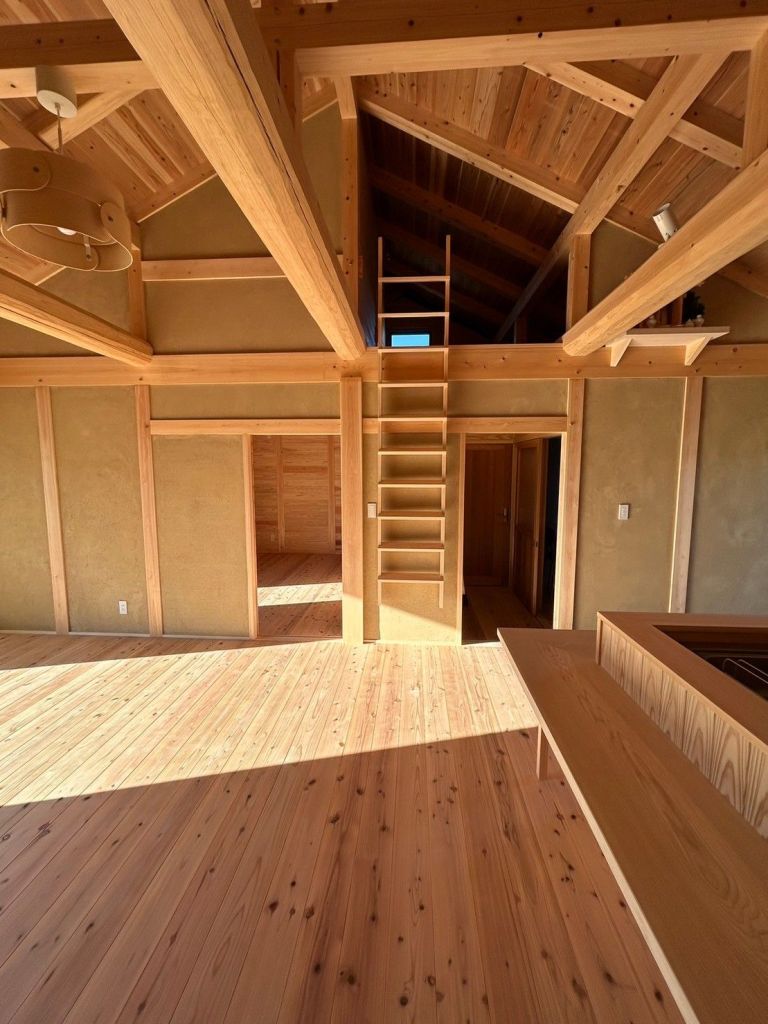
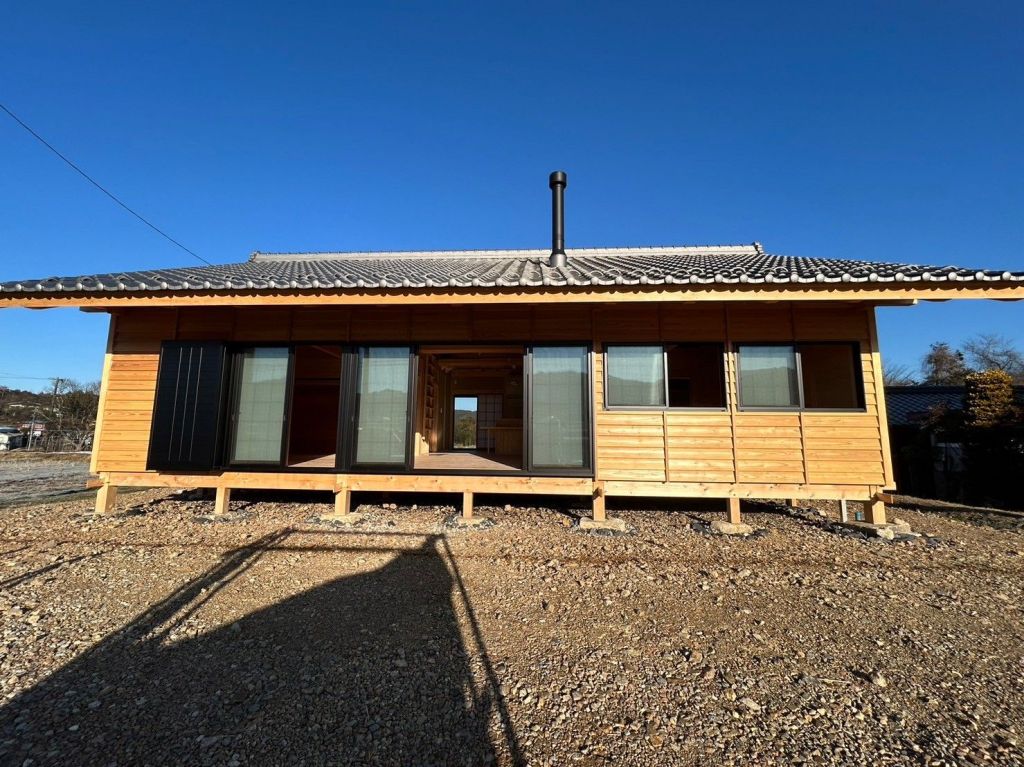
    We spent the majority of our practical training building a small house, which was constructed inside the training ground – this meant that work could continue throughout the year and the schedule wouldn’t be affected by the rainy season or the brutal heat of mid summer.

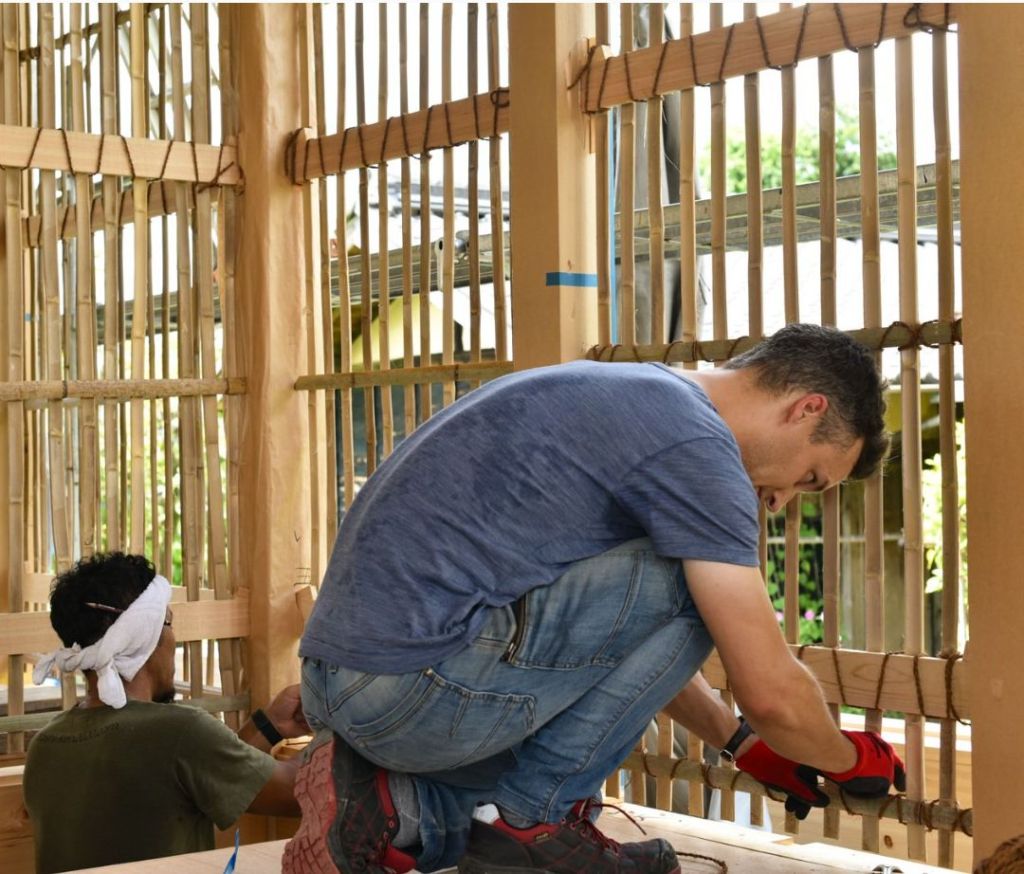
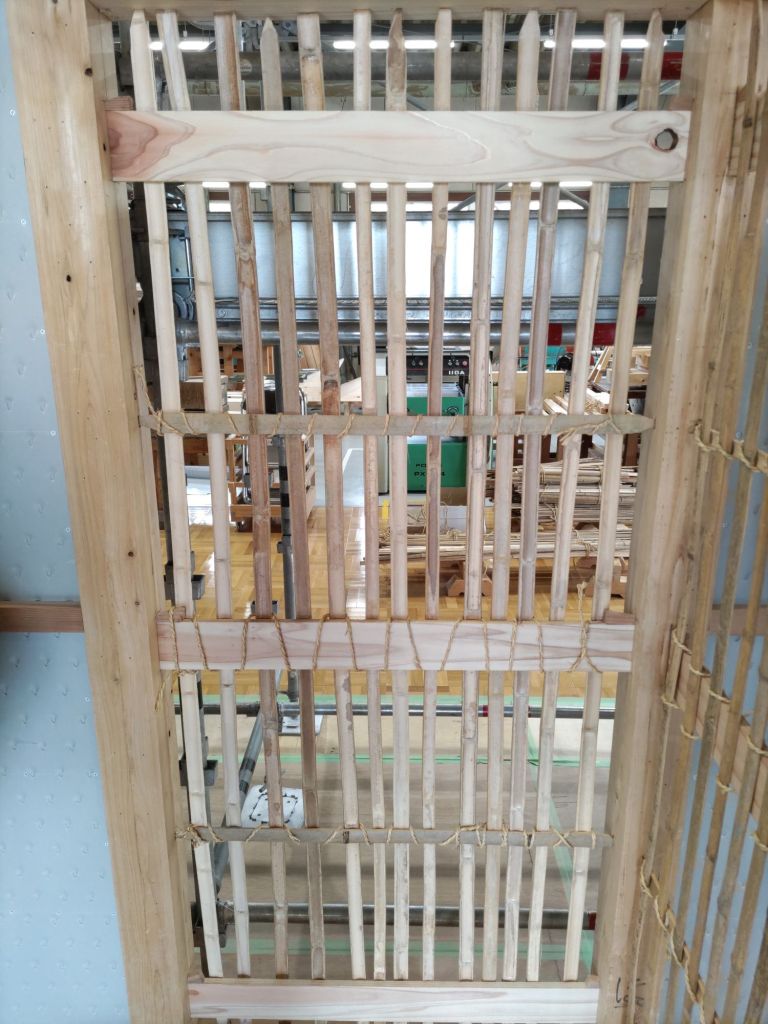
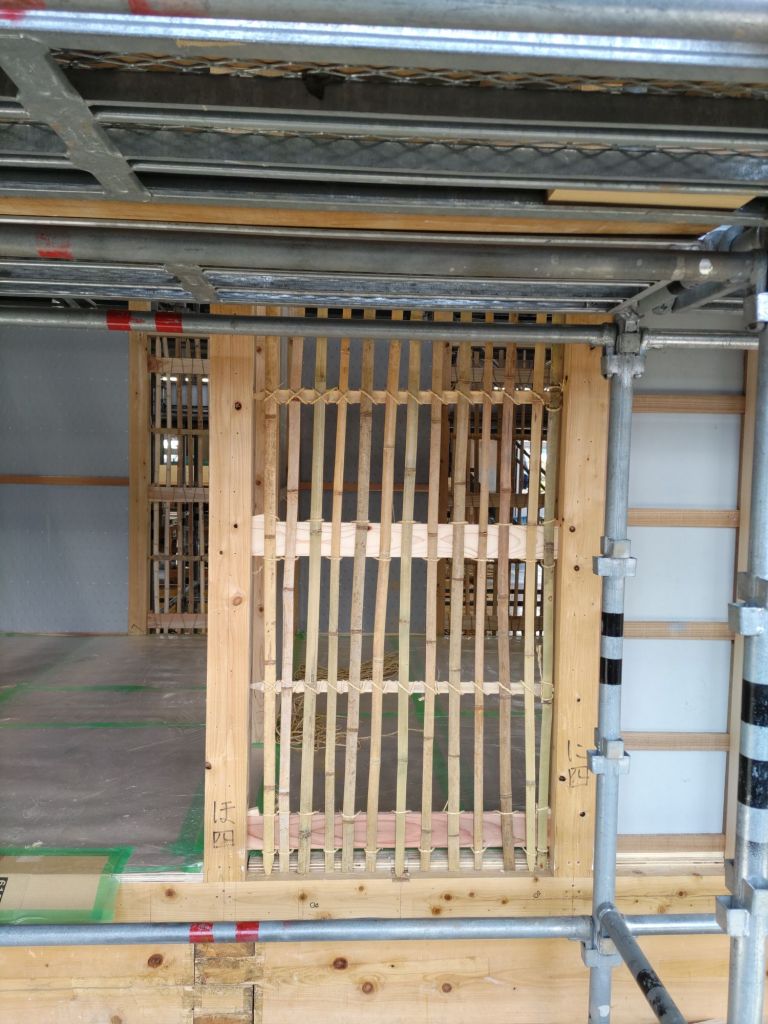
    As the building work progressed, professional trades people and companied would come and provide specific training during different stages of the build:

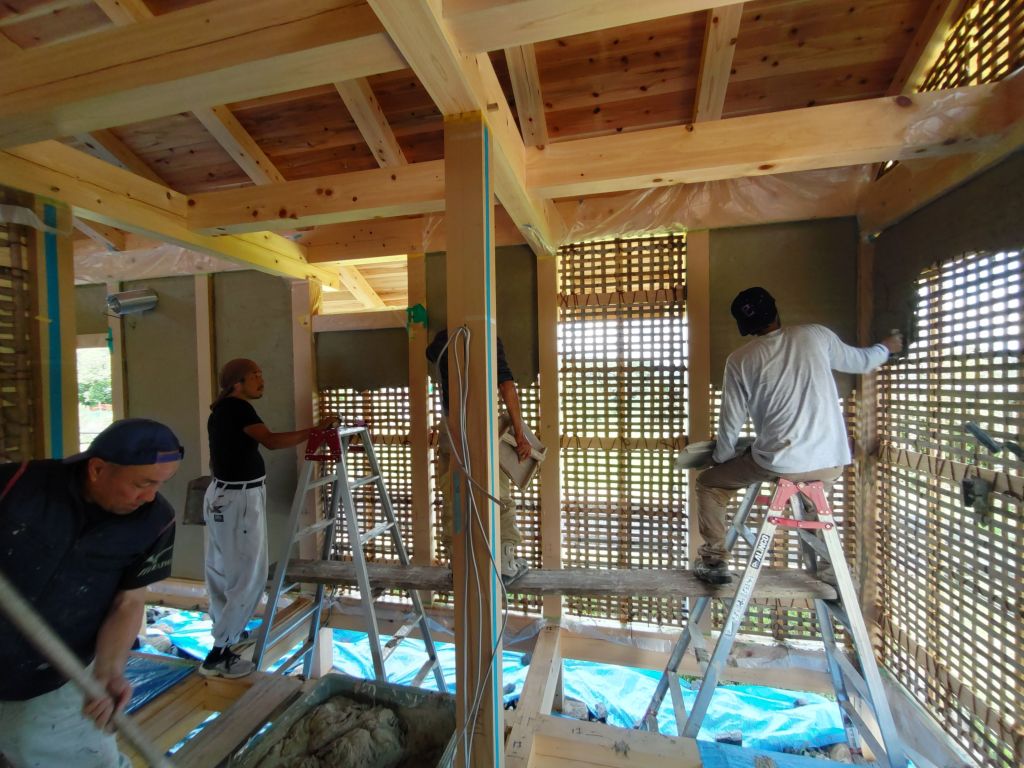
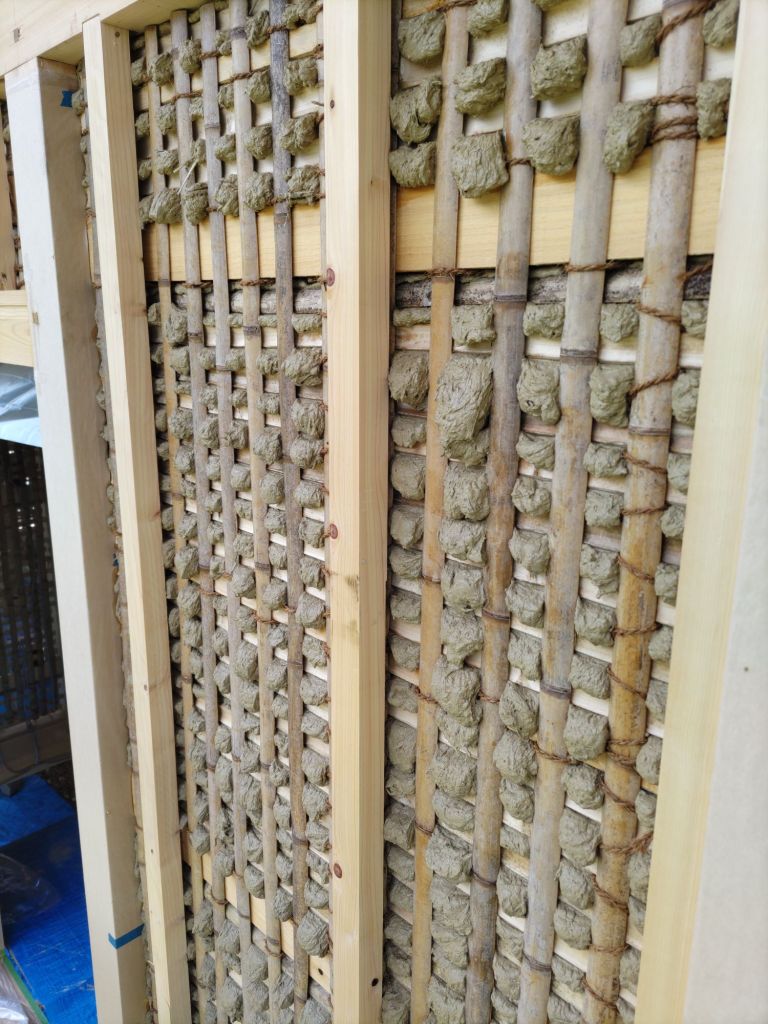
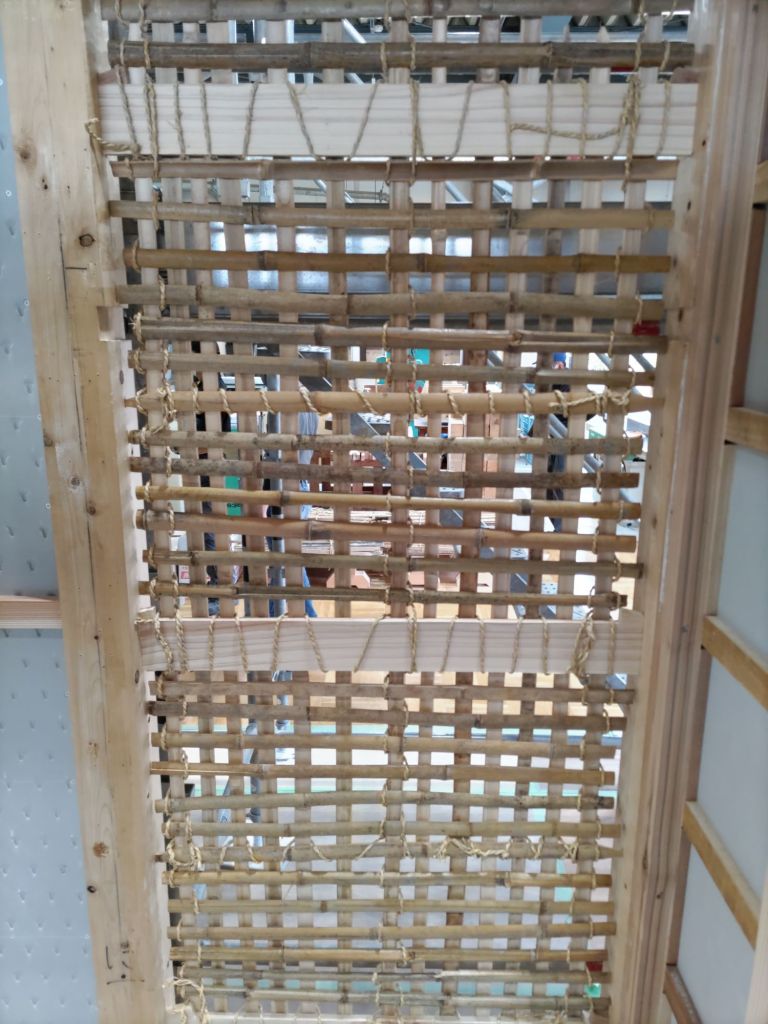
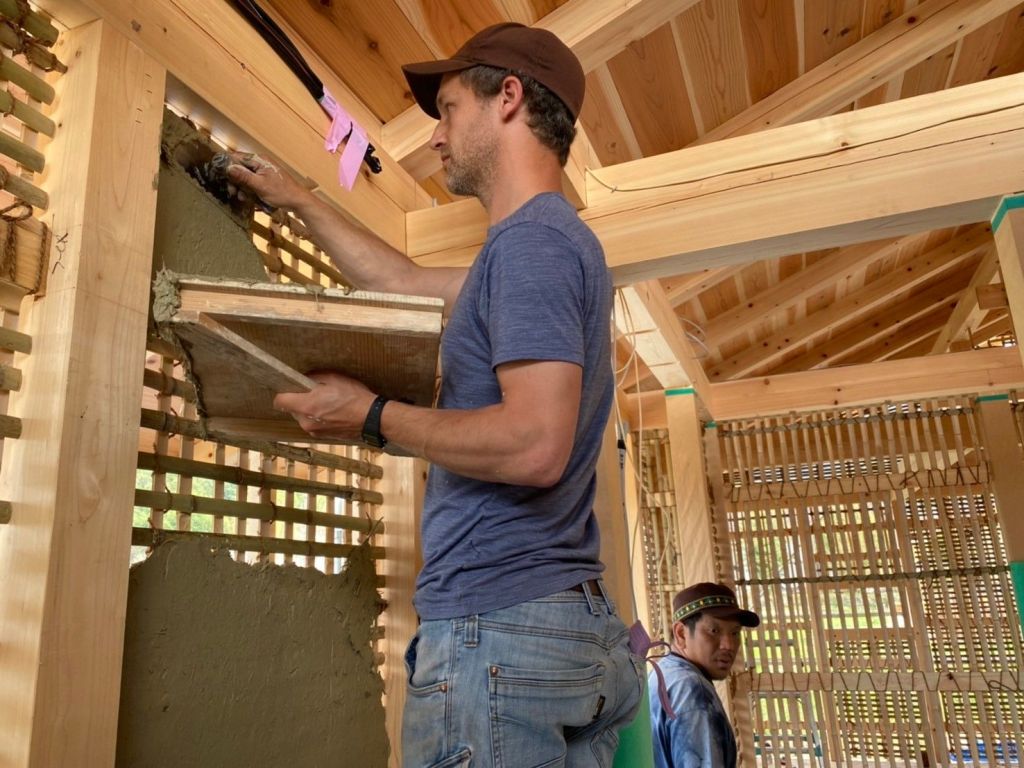
    • Plastering – both using plasterboard and traditional bamboo lattice (竹小舞 – “takekomai”)
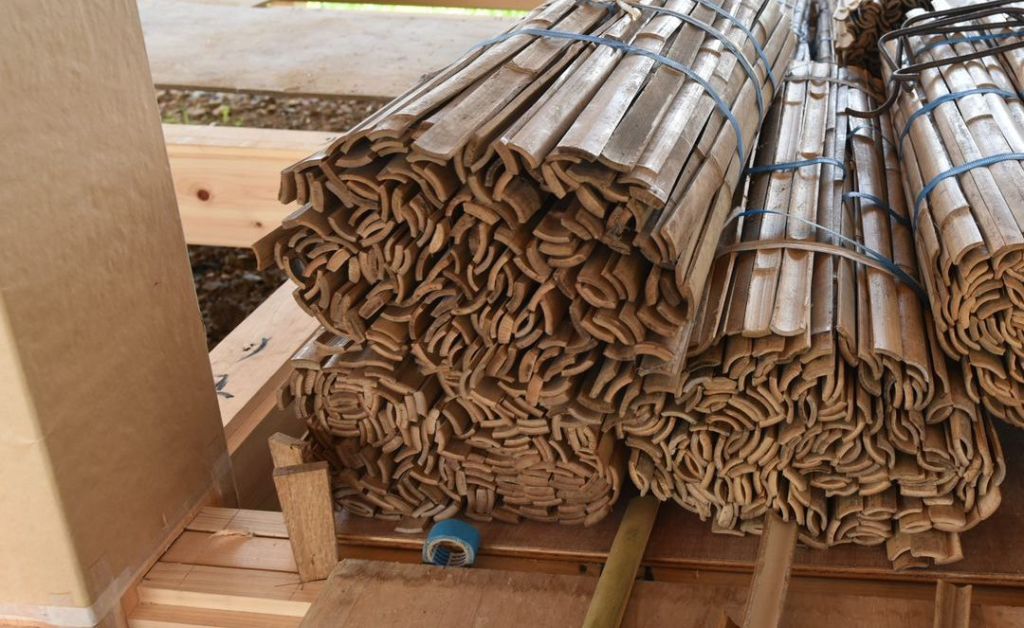
    • Roofing – Using traditional Japanese roof tiles (瓦 – “kawara”). This also included trying the national roof tiling skills test.

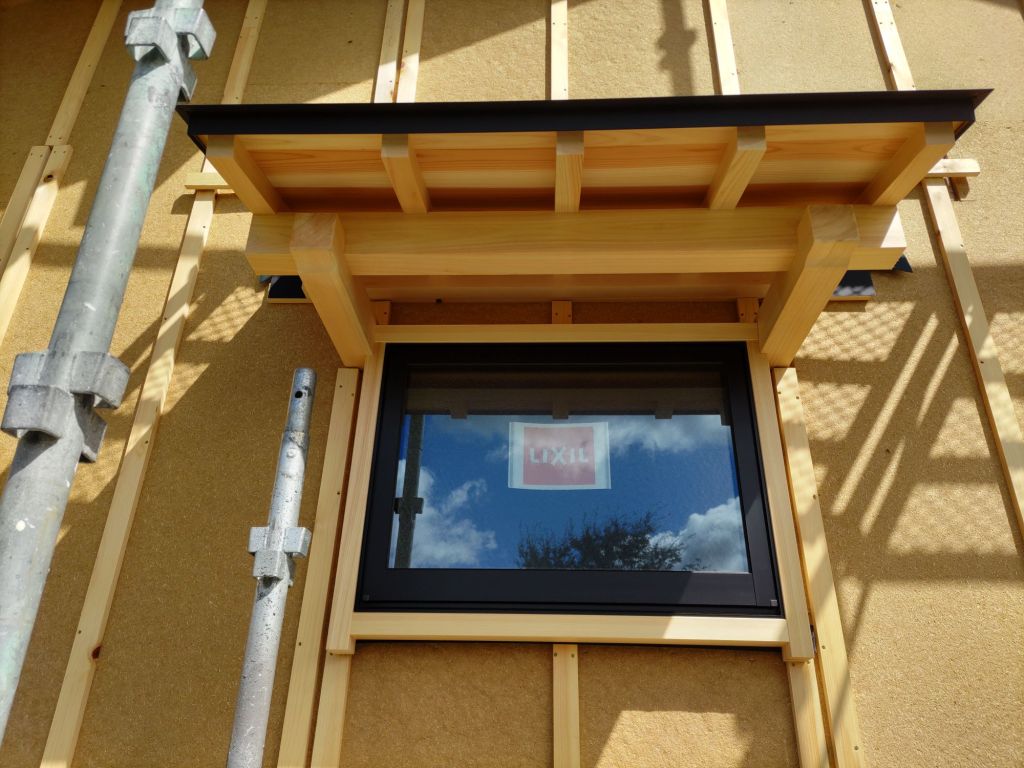
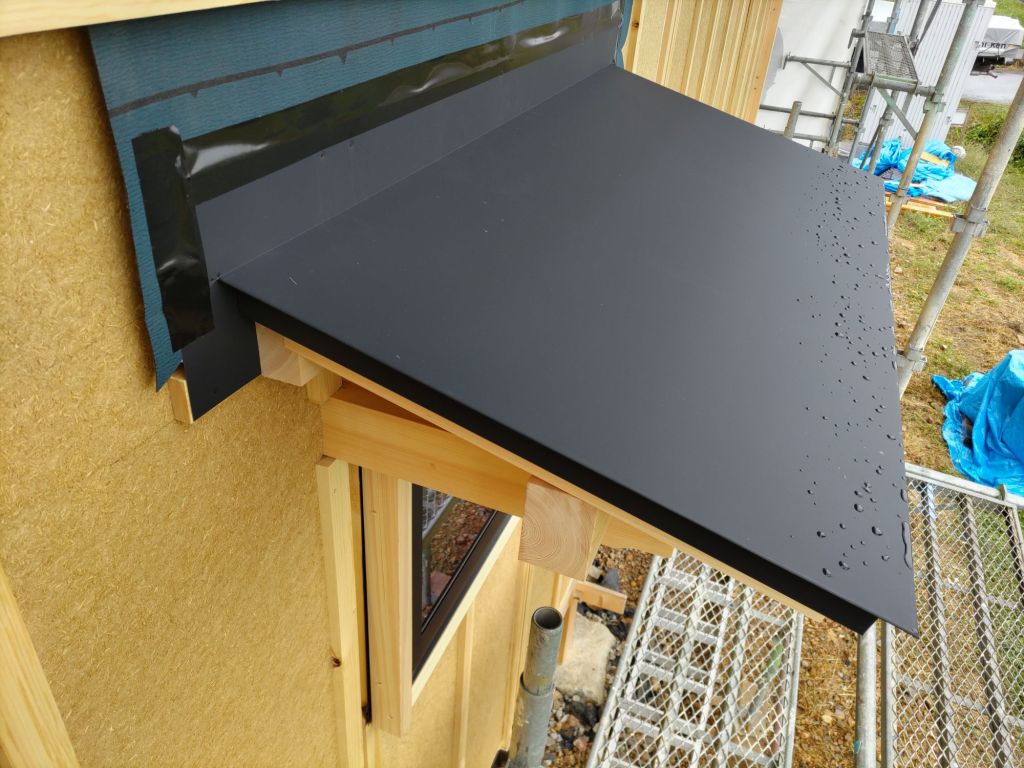
    • Metal siding – A two day course which involved cutting and installing sheet metal siding (板金 – “bankin”) on the external walls of the house.
    • 2D design / CAD – These classes were taught by a qualified architect. The focus was on learning how to use JW CAD (A free Japanese 2D CAD software).

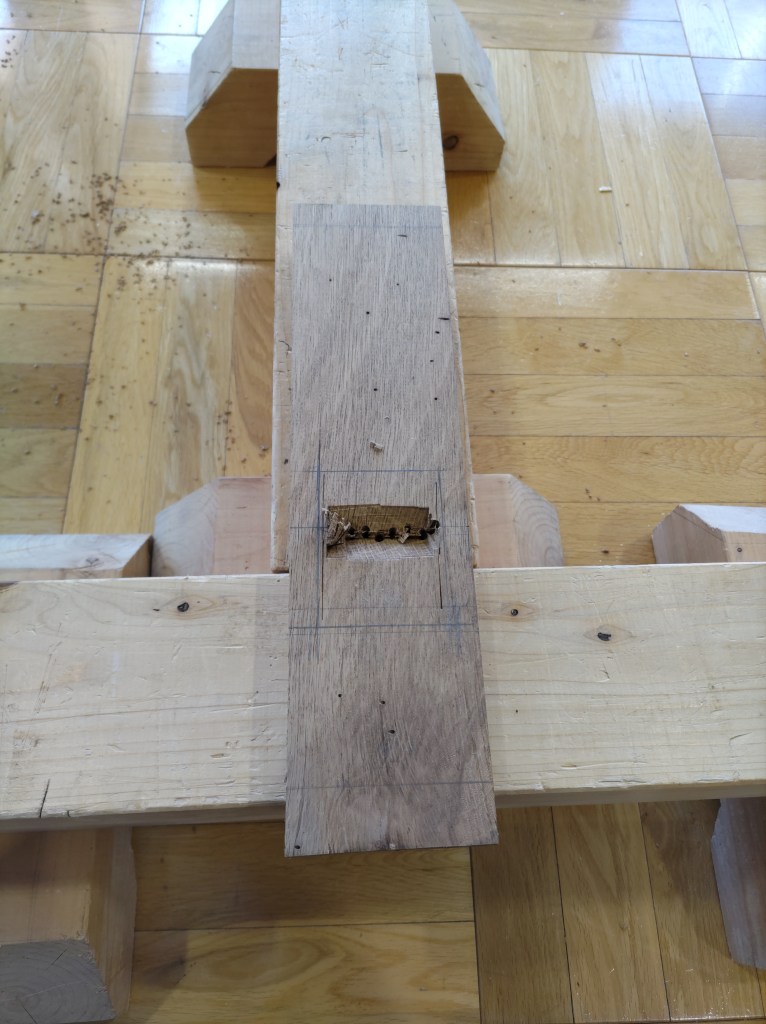
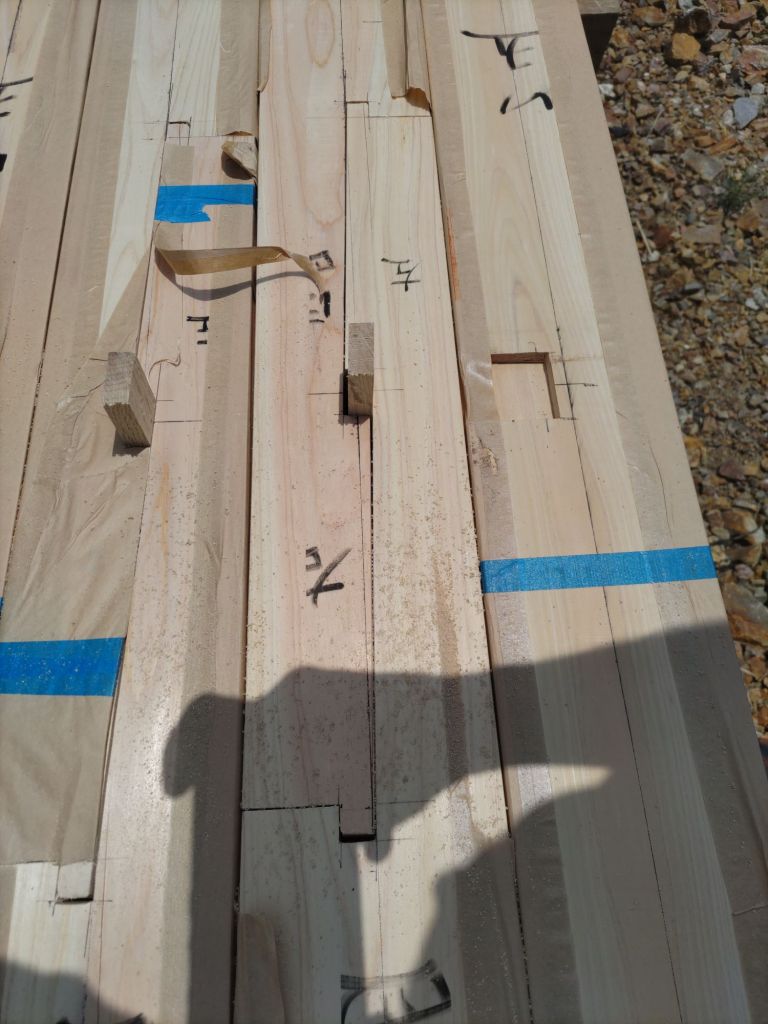
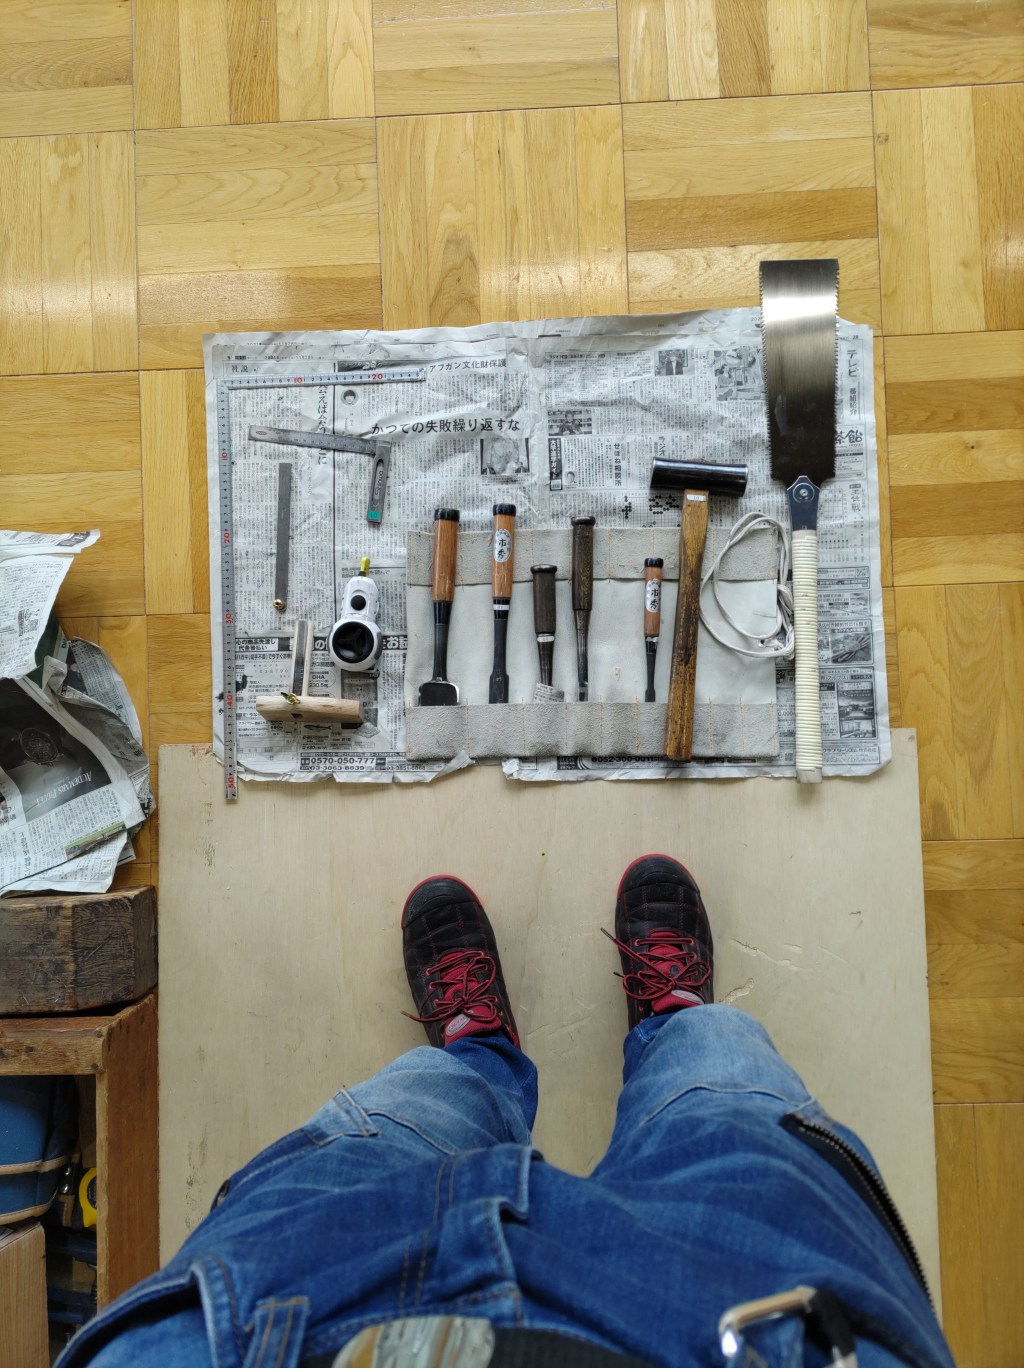
    The course finished with a practical exam, which involved making a corner section of a mud sill with a brace under timed conditions. After the exam finished, the pieces you make are taken apart and measured / tested for tolerances.

    I really enjoyed the opportunity to try different trades and learn directly from craftspeople who have years of experience. I would also add that its a unique opportunity to practice speaking Japanese in the context of a construction site without the pressure of working for a real client / company, who may not be so forgiving about mistakes or delays whilst you are learning.

    One of the areas I struggled with was living on the campus from Monday to Friday. I knew that immersing myself in Japanese was key to making the most of my one year experience, however I underestimated the challenges of living alongside 18 year old Japanese guys who have never lived away from home before. Add to this the fact that it was during the corona pandemic, so in addition to a 9 o’clock curfew, there were many other rules and schedules in place to try to mitigate infection.

    Cost of study

    As a final note, I will mention finances. I worked for several years in Japan before I decided to study at the academy. During my previous employment I made contributions to employment insurance (雇用保険 – koyō hoken), which I was able to use to subsidise my studies. I believe the course itself is also heavily subsidised by the prefectural government, meaning even without financial help, it is incredibly affordable. Unfortunately I didn’t keep detailed records of what I spent during the year, but if you check the academy’s website I am sure the current costs will be listed.

    Overall, I would recommend the experience to anyone looking to immerse themselves in Japanese and to gain industry specific knowledge without investing a vast amount of time and money. There are other courses available which cost more money and take 2 or 3 years to complete, however I think this particular course is a fantastic opportunity for anyone who wants to take their first steps into the construction / craft industry, especially if you are unsure of the specific path you want to follow.

  • Making a plane body (カンナ台).

    There are many videos which have been published detailing the set up of a new Japanese hand plane or block plane. Recently I have also seen a few videos detailing how to make your own plane body from scratch. Most plane bodies, or “kanna dai” (カンナ台) in Japanese, are made by machine these days.

    If you are in the market for a cheap hand plane, and have the time and patience, you can buy used hand planes online. Usually the “dai”/body is in a pretty poor state, so you will need to either buy or make a new one. Pre machined plane bodies can be purchased online, however they often require extensive set up / adjustment to get the correct fit for the blades.

    I was lucky to meet a plane body craftsman who used to make plane bodies by hand. Here are some notes and photos from the class he taught while I was at college.

    The original plane body which came with the used hand plane

    I purchased a used hand plane on Yahoo Auctions for around 20 USD. It is difficult to see clearly in the image above, however the original body was badly warped and had a huge crack down the centre. It could have possibly been repaired using a bolt through the body to hold it together, but I decided to try and remake the body from scratch.

    Chip breaker and main blade

    The chip breaker and main blade weren’t in too bad shape. I lapped the back of the blade, sharpened it and adjusted the fit between the two blades. (See links at the end of this article for sharpening / plane set up).

    Plane blade after being lapped on a diamond plate

    Crafting the body

    The first step is choosing the right materials and milling a blank. White oak and Zelkova (Keyaki) are often used as they are stable and tend to resist warping.

    When marking out the plane body, make sure that the face of the wood will become the sole / bottom of the plane. The reason for this is because the wood will naturally “cup” over time, which means it will be easier to flatten the sole of the plane body if the wood is used face side down.

    Dimensions / marking out of the plane body

    Because it is necessary to use a well-dried piece of hardwood, cutting the openings using hand tools only can take a lot of time and be tough on your tools. (Although it means you’ll get lots of practice sharpening blunt chisels!). After marking out, It is best to use a small drill bit to start the blade mouth opening. After that, it is a case of slowly hollowing out the space for the blade and chip breaker, making sure to regularly check the slope angle using a bevel gauge or a paring jig.

    Once the openings for the blade and chipbreaker have been chiselled out, you will need to cut slots for the main blade to slide into. This can be done with a small saw and a 3mm chisel. I have also seen it done with hand files.

    The final stages involve installing a pin to hold the chip breaker in place and to adjust the fitting of the main blade. This stage really takes time and patience, as you will need to insert and remove the blade many times whilst slowly paring back material from the plane body each time.

    While it does take time and patience, I am still using this plane 3 years later. There’s something about making / adjusting your own tools that gives you an extra level of motivation and satisfaction when working. I highly recommend trying it.

    Please see below for links to more detailed videos in plane body making and set up.

    Testing out the new plane / adjusting the sole
  • Becoming a carpenter in Japan

    Becoming a carpenter in Japan

    My first set of Japanese hand tools

    If you have read my back story (published here), then you will already know that I have been on a journey to become a craftsman (職人 “shokunin” in Japanese) since I first met my friend, Hayashi-san, back in 2016. He gave me a glimpse into the world of Japanese craftsmanship and I felt drawn to the work and the way of life.

    A polaroid of Hayashi-San & Me (Factory Hayashi, Takaoka City)

    After spending 5 years living and working in Japan, I had many opportunities to see Japanese craftsmanship first hand. One particular experience, which was a visit to Kawai Kanjiro’s house in Kyoto, really inspired me to focus my efforts on stuying Japanese traditional carpentry.

    A beginner amongst beginners

    I am certain there are many viable routes to becoming a carpenter in Japan. Regardless of the route you take, and whether you have previous carpentry experience or not, one obvious challenge presents itself: how to cross the language barrier and work culture gap?

    I started learning Japanese before I came to Japan, and would have considered myself at a “conversational” level when I first started looking for a carpentry apprenticeship. After my experience working with Hayashi-san, it became clear that I could function in a work environment, but the communication wasn’t always smooth. I was lacking the vital ingredients – the technical terminology to understand and express things clearly.

    To become a successful carpenter in Japan, aside from the practical skills and experience, you will also need a firm grasp of “kenchiku yōgō” (建築用語 – architectural terminology).

    Based on my lack of practical experience and need to learn the technical terminology it became clear that trying to start work within a company would be very stressful at best, impossible at worst.

    I needed to go where other beginners go.

    I needed to go back to school.

    Read my next post to hear about my experience entering a “Senmon gakkō” (専門学校 – vocational college), including living on campus in a dormitory.