There are many videos which have been published detailing the set up of a new Japanese hand plane or block plane. Recently I have also seen a few videos detailing how to make your own plane body from scratch. Most plane bodies, or “kanna dai” (カンナ台) in Japanese, are made by machine these days.
If you are in the market for a cheap hand plane, and have the time and patience, you can buy used hand planes online. Usually the “dai”/body is in a pretty poor state, so you will need to either buy or make a new one. Pre machined plane bodies can be purchased online, however they often require extensive set up / adjustment to get the correct fit for the blades.
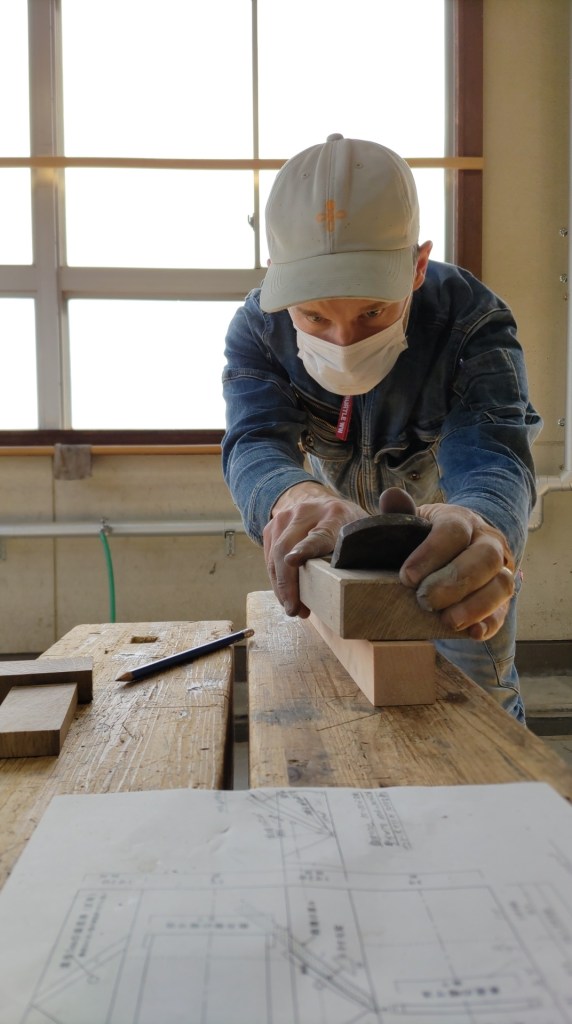
I was lucky to meet a plane body craftsman who used to make plane bodies by hand. Here are some notes and photos from the class he taught while I was at college.
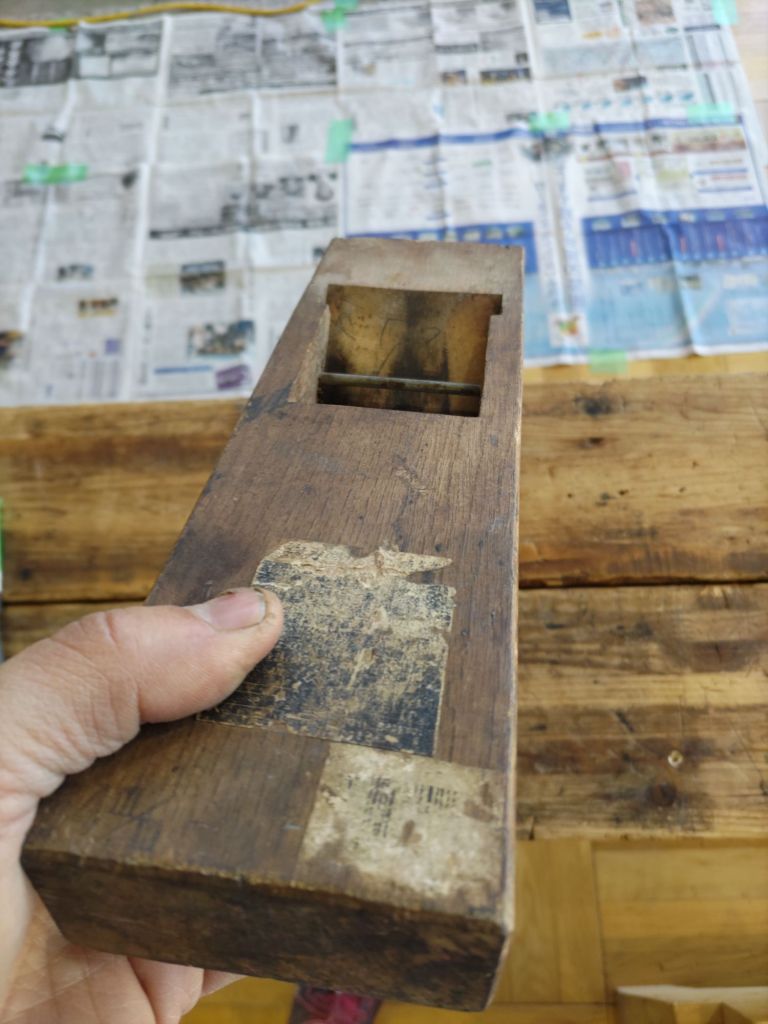
I purchased a used hand plane on Yahoo Auctions for around 20 USD. It is difficult to see clearly in the image above, however the original body was badly warped and had a huge crack down the centre. It could have possibly been repaired using a bolt through the body to hold it together, but I decided to try and remake the body from scratch.
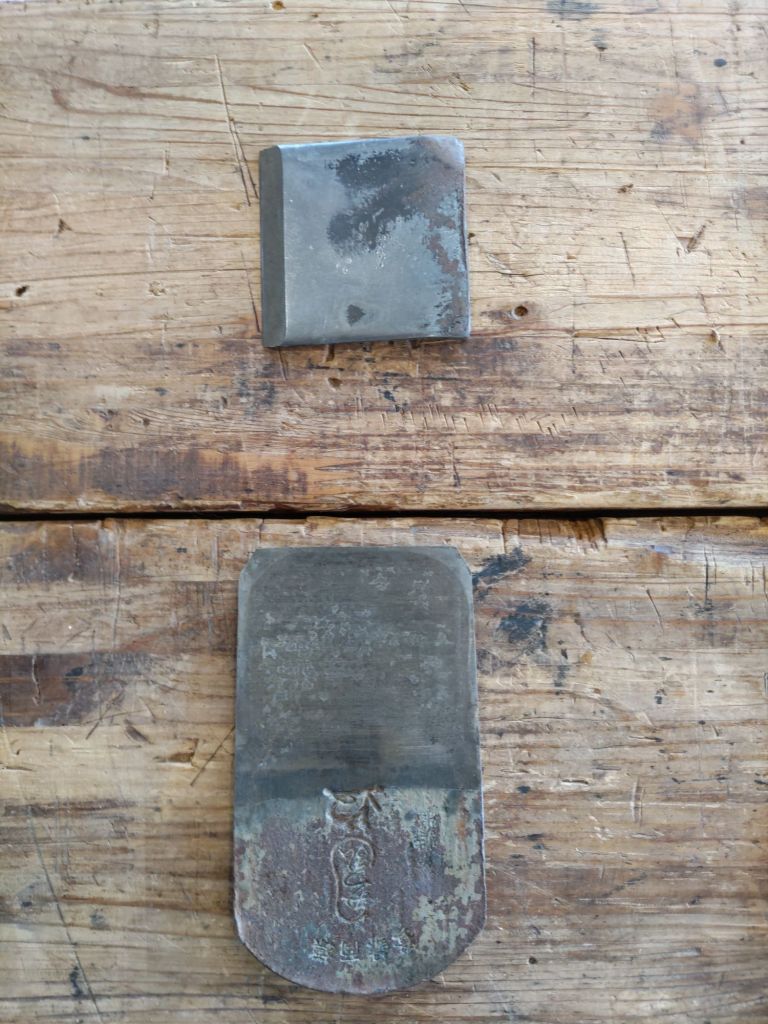
The chip breaker and main blade weren’t in too bad shape. I lapped the back of the blade, sharpened it and adjusted the fit between the two blades. (See links at the end of this article for sharpening / plane set up).

Crafting the body
The first step is choosing the right materials and milling a blank. White oak and Zelkova (Keyaki) are often used as they are stable and tend to resist warping.
When marking out the plane body, make sure that the face of the wood will become the sole / bottom of the plane. The reason for this is because the wood will naturally “cup” over time, which means it will be easier to flatten the sole of the plane body if the wood is used face side down.
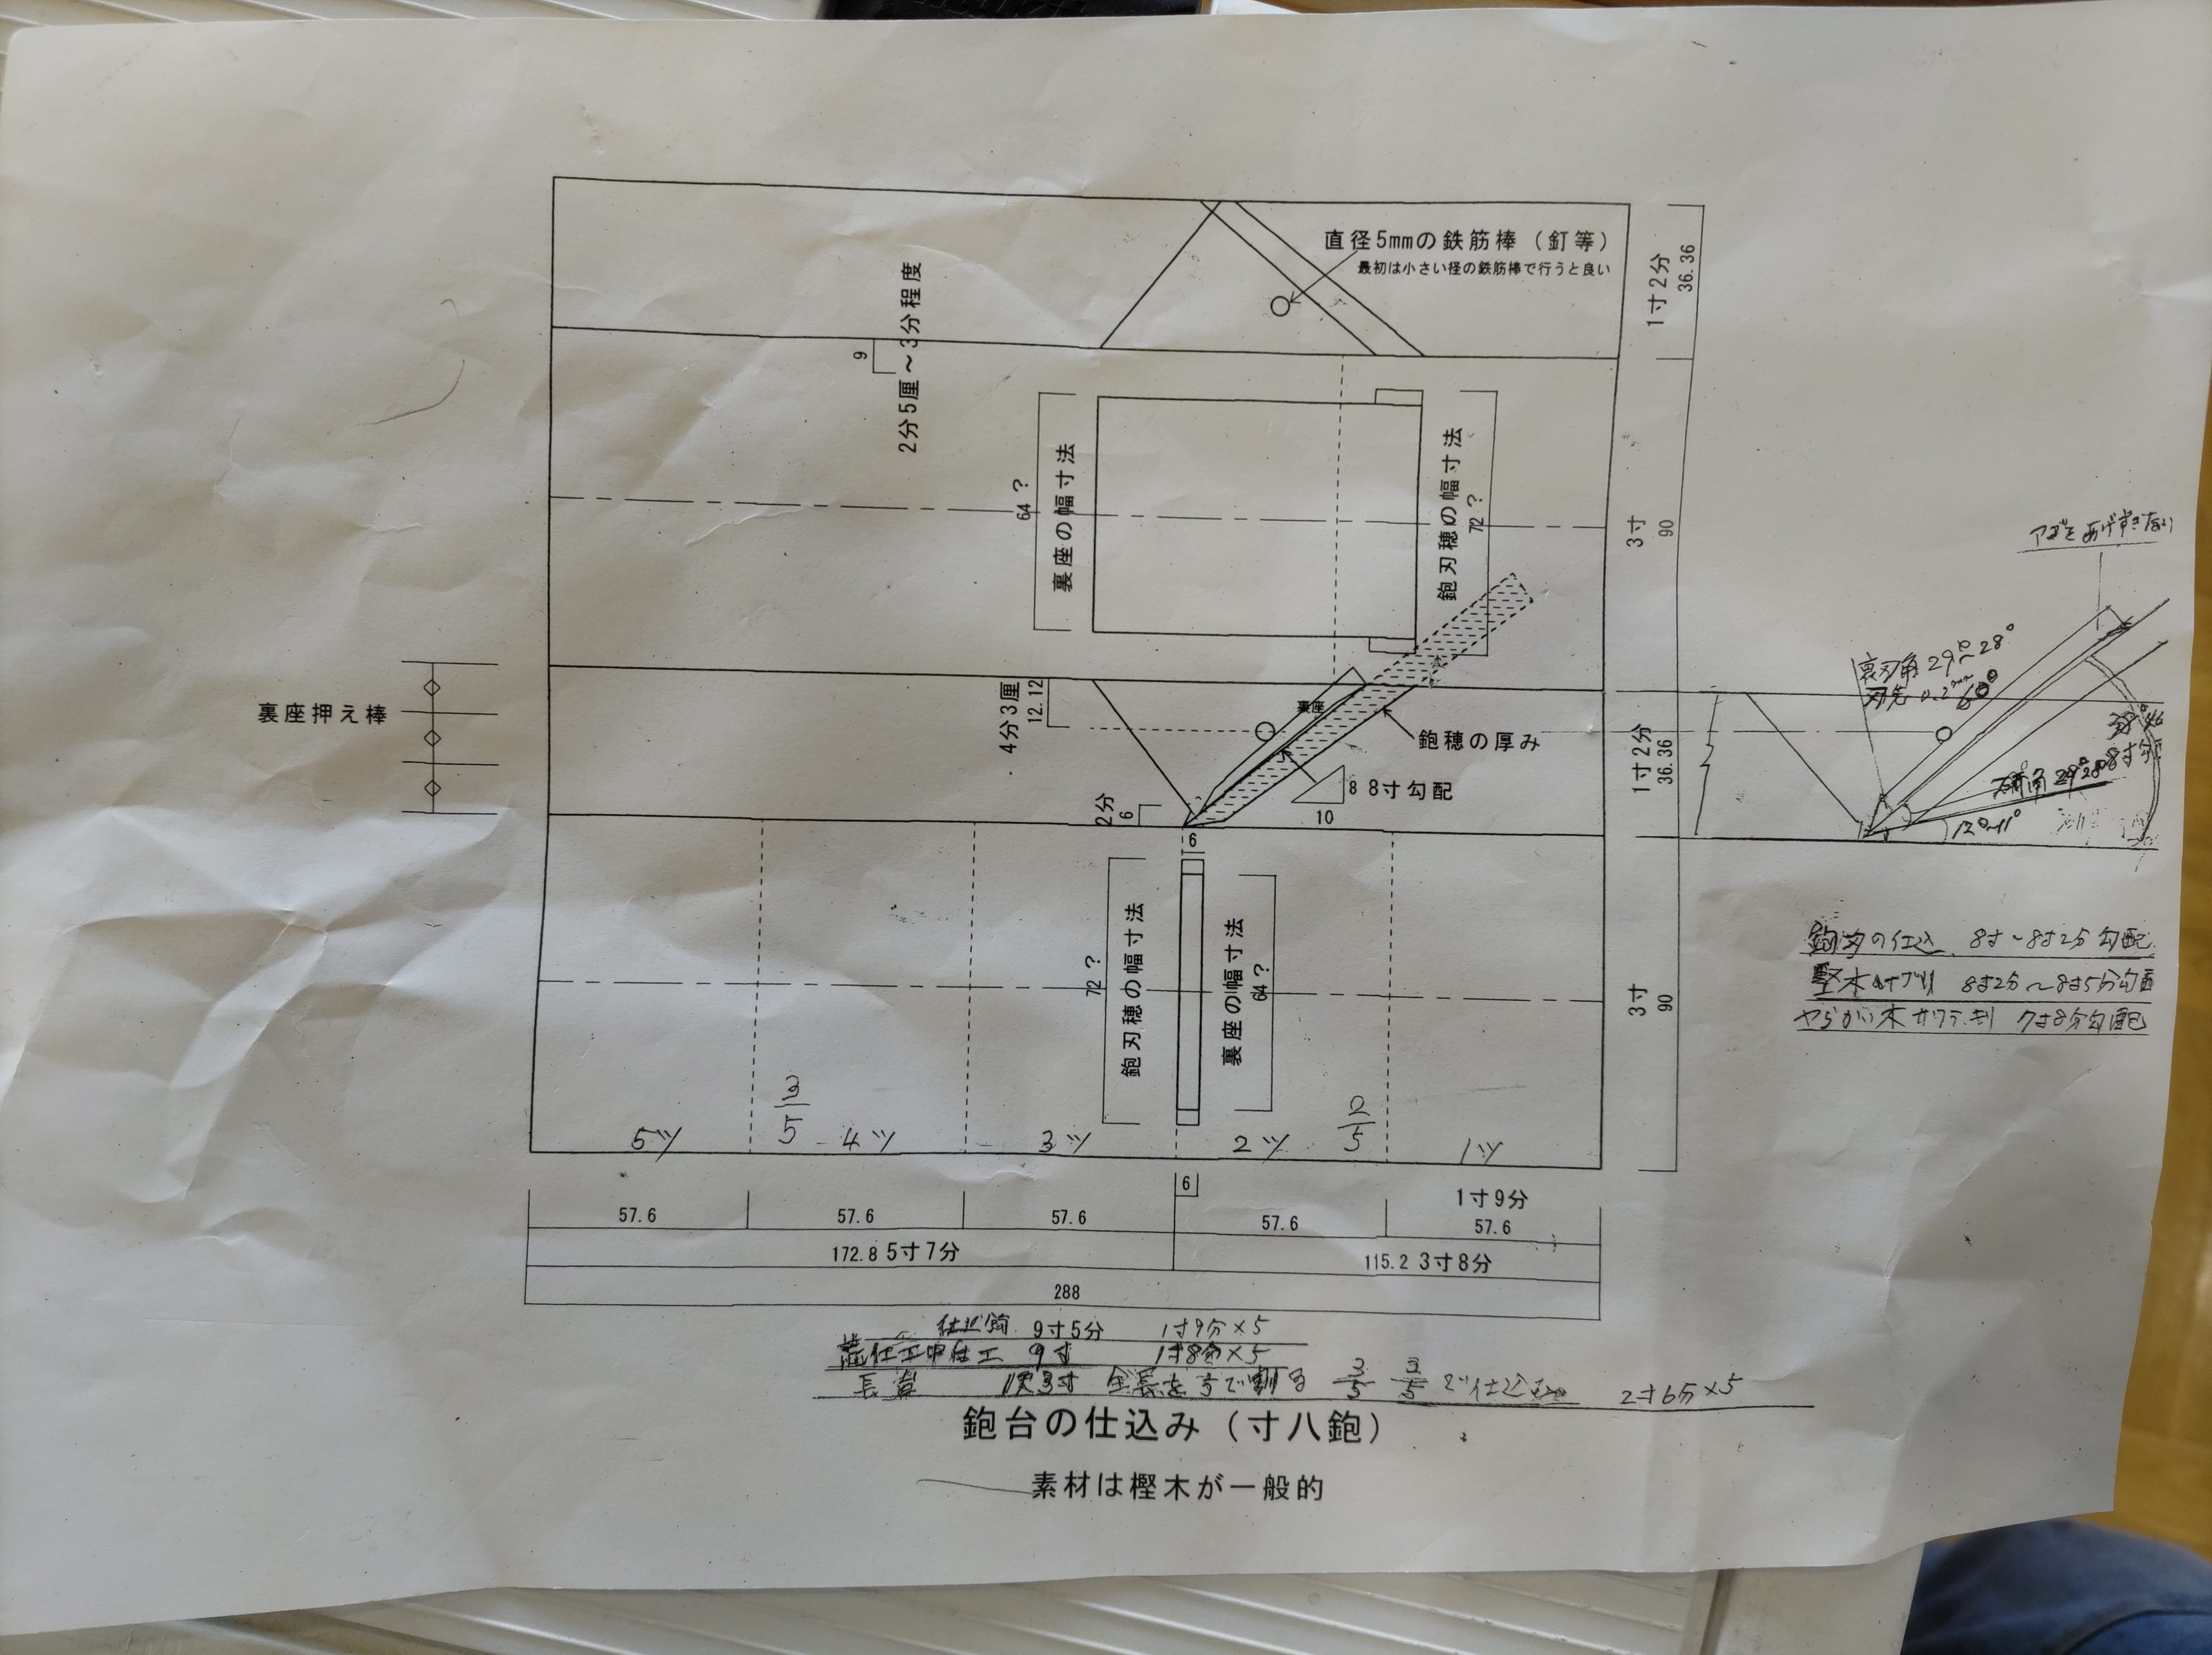
Because it is necessary to use a well-dried piece of hardwood, cutting the openings using hand tools only can take a lot of time and be tough on your tools. (Although it means you’ll get lots of practice sharpening blunt chisels!). After marking out, It is best to use a small drill bit to start the blade mouth opening. After that, it is a case of slowly hollowing out the space for the blade and chip breaker, making sure to regularly check the slope angle using a bevel gauge or a paring jig.
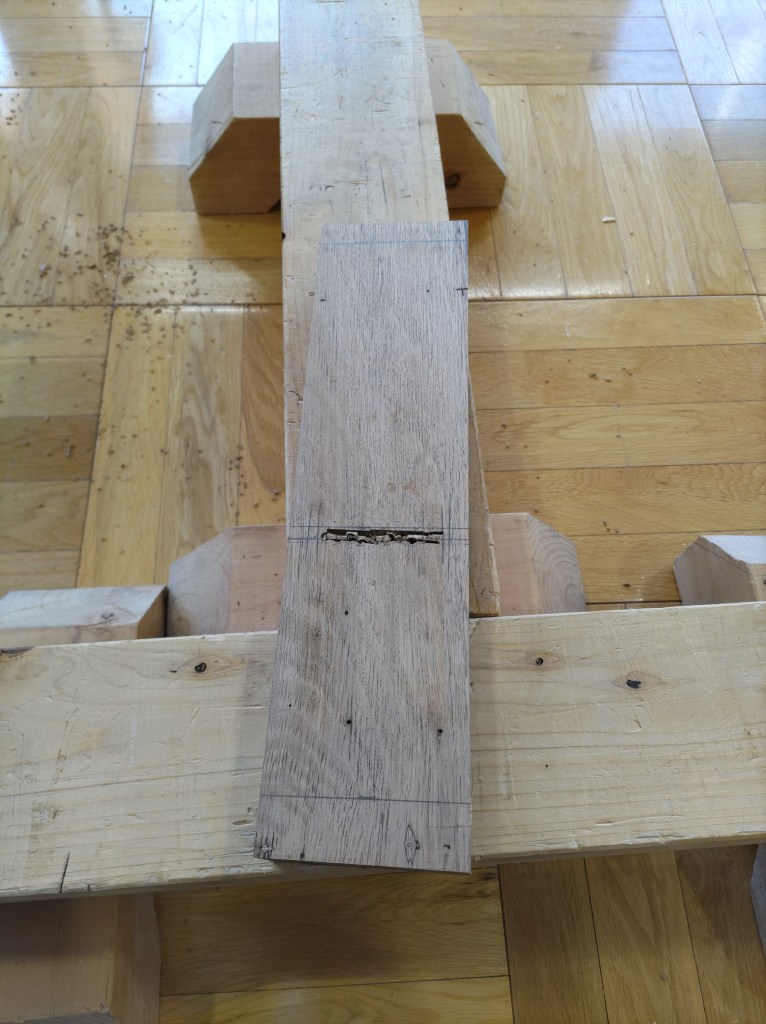
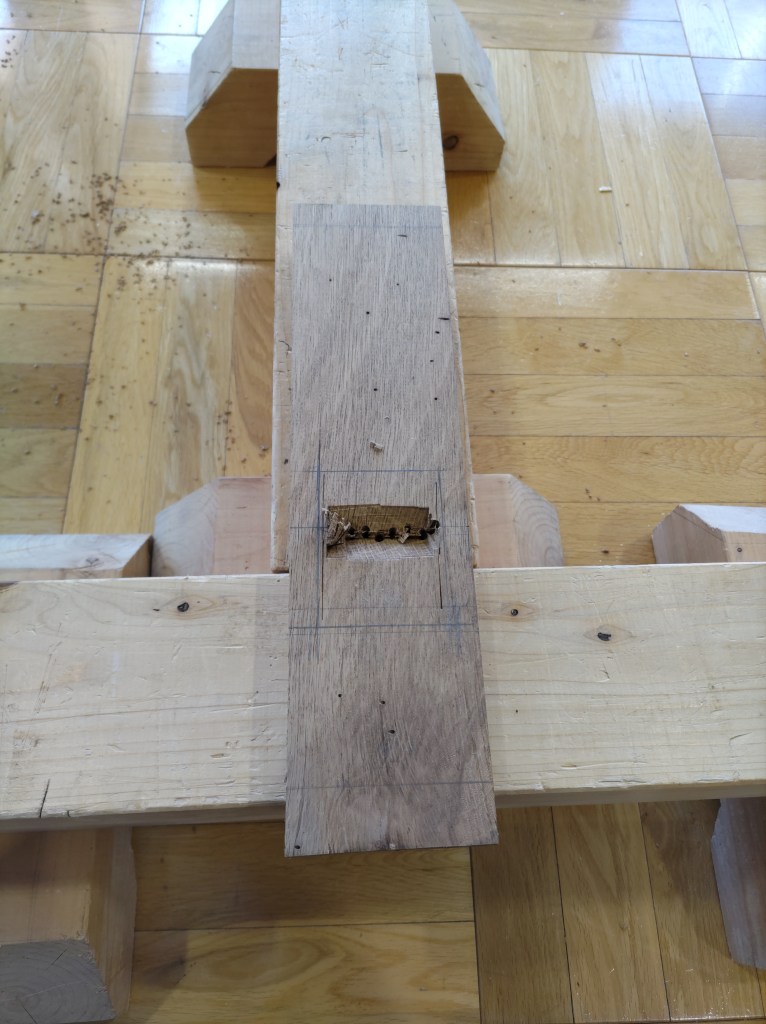
Once the openings for the blade and chipbreaker have been chiselled out, you will need to cut slots for the main blade to slide into. This can be done with a small saw and a 3mm chisel. I have also seen it done with hand files.
The final stages involve installing a pin to hold the chip breaker in place and to adjust the fitting of the main blade. This stage really takes time and patience, as you will need to insert and remove the blade many times whilst slowly paring back material from the plane body each time.
While it does take time and patience, I am still using this plane 3 years later. There’s something about making / adjusting your own tools that gives you an extra level of motivation and satisfaction when working. I highly recommend trying it.
Please see below for links to more detailed videos in plane body making and set up.